If you have ever grown elephant ears in your garden, you know how fast they can grow. These plants have large, foliage that can quickly become droopy if not properly maintained. Many gardeners choose to divide their elephant ears to promote healthy growth and keep them looking their best. In this article, we will show you how to separate elephant ears successfully so that you can have a larger mass of these beautiful plants in your yard.
The first step in separating elephant ears is to decide when and how to do it. Most gardeners recommend dividing the plants in the spring or fall when the weather is cooler. This is also the time when the plants are not actively growing, making it safer for the plants. When choosing a location for your elephant ear divisions, the plants need to be in a spot with enough sunlight and moisture. They also prefer rich, well-draining soil.
To begin separating your elephant ears, start by digging around the base of the plant with a sharp shovel or garden fork. Carefully lift the plant from the ground, making sure to not damage the roots. The roots can be quite thick and may require some force to separate them. Once you have separated the plants, you can choose to replant them in containers or directly in your garden.
Before planting the divided elephant ears, it is important to clean the roots. This can be done by gently removing any excess soil or rotting material with your fingers or a garden hose. If there are any yellowing or rotting roots, it is best to cut them off with clean shears. This will help promote healthy growth in the new plantings.
When planting elephant ears, it is important to give them enough space to grow. These plants can become quite large over the years, so allow for at least a foot between each plant. Plant the divisions at a depth of about half an inch and backfill the hole with soil, making sure to firm it down around the roots. Once planted, water the newly divided elephant ears thoroughly to help settle the soil.
After planting, your elephant ears may look a little droopy. Don’t worry – this is normal and they will perk up after a few days. To help promote healthy growth, it is a good idea to add a layer of mulch around the base of the plants to help retain moisture and suppress weeds.
With proper care and maintenance, your newly separated elephant ears should grow successfully. Make sure to water them regularly, especially during dry spells, and apply a slow-release fertilizer to promote healthy foliage. Keep an eye out for any signs of pests or diseases and treat them promptly if needed. With time, patience, and a little bit of gardening know-how, your elephant ears will thrive and become a beautiful addition to your yard.
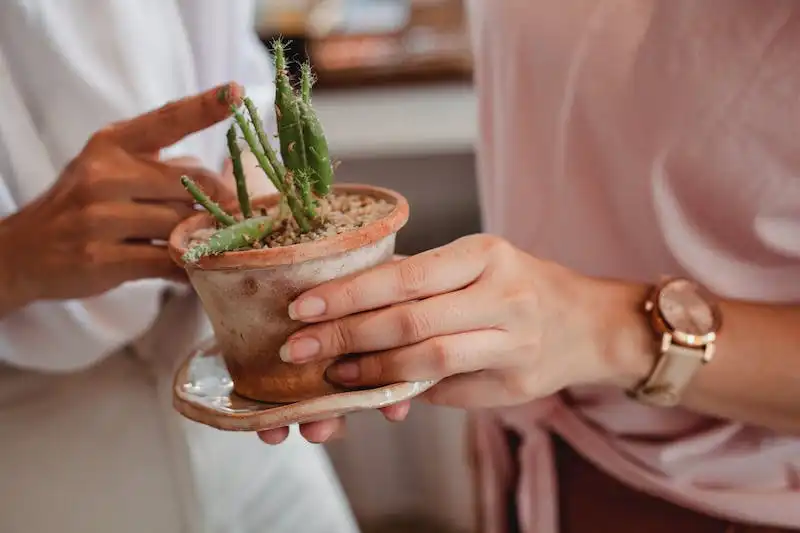
Elephant Ear
Elephant Ear, also known as Colocasia esculenta, is a tropical plant that can add a touch of exotic beauty to any garden or indoor space. It gets its name from its large, floppy leaves that resemble the ears of an elephant. If you are interested in growing Elephant Ear, there are a few requirements you’ll need to consider.
First and foremost, Elephant Ear is a prime choice for those who have a lot of light available. The plant needs bright, indirect sunlight to thrive, so placing it near a window or in a well-lit room is ideal. What’s even better is that Elephant Ear can adapt to lower light conditions, so don’t fret if you don’t have the brightest spot available.
Elephant Ear is not a plant that needs a lot of water, but it does need enough to keep the soil moist. Overwatering can lead to problems such as root rot, so be sure to water them sparingly. Additionally, Elephant Ear is a huge grower and needs a lot of space. Make sure to plant it in a well-drained soil to ensure its healthy growth.
If you want to propagate Elephant Ear, you can do so by separating the bulb or by cutting the plant in halves. To separate the bulb, carefully dig up the plant and use a sharp knife or shears to divide it into smaller sections. Be sure to clean your tools to avoid any potential disease transmission. When cutting the plant in halves, be sure to have at least one eye on each half to ensure healthy growth.
Once separated, you can plant the divided bulbs or halves in a new location. Be sure to cover the bulbs with soil, leaving the spadix (the central flower stalk) exposed. Provide enough water to settle the soil around the bulbs and to give them a good start. If you are planting them outdoors, it’s best to do this after the danger of frost has passed. However, if you are planting them indoors, you can do it at any time of the year.
When it comes to Elephant Ear care, it’s important to remember that the leaves of the plant are the most delicate part. They can easily get damaged by wind, heavy rain, or even by touching them too roughly. If you see any yellowing or browning leaves, remove them carefully to prevent any further damage. Additionally, Elephant Ear loves humidity, so you can mist the leaves or place a tray of water nearby to increase moisture levels.
Elephant Ears can be susceptible to cold weather and will start to die back once temperatures drop below 50 degrees Fahrenheit. If you live in a colder climate, consider digging up and storing the bulbs in a cool, dry place, like a garage or a basement. You can keep them in plastic bags with some moist mulch to prevent them from drying out. Replant them in the spring when the temperatures start to warm up.
In conclusion, Elephant Ear is a beautiful plant that can add a tropical touch to any garden or indoor space. It is relatively easy to propagate and care for, although it is important to follow certain guidelines to ensure its successful growth. By providing it with enough light, water, and space, you can enjoy the majestic beauty of Elephant Ear for many years to come.
How to Separate Elephant Ears
Separating elephant ears can be a hard task, but with the right care and technique, it can be successfully done. Elephant ears (also known as taro) are plants with huge, dark green leaves that resemble the shape of an elephant’s ear. They are grown for their attractive foliage and can bring a tropical touch to your garden.
Here are the steps to safely separate elephant ears:
1. Choose the right time:
The best time to separate elephant ears is in late spring or early summer when the plant is actively growing. This will give the separated bulbs enough time to establish themselves and grow before the colder temperatures of winter.
2. Prepare the tools:
Before you start, make sure you have a pair of sharp shears or a knife to cut the plant into halves. It is important to use sanitized tools to minimize the risk of disease transmission.
3. Dig up the bulbs:
Using a fork or shovel, carefully dig around the base of the plant to loosen the soil. Be gentle to avoid damaging the plant or its roots.
4. Separate the bulbs:
Once the bulbs are out of the ground, you can begin separating them. Look for natural divisions or growth points between the bulbs and gently pull them apart. In some cases, you may need to use a sharp knife or shears to divide them.
5. Plant the divisions:
After separating the bulbs, choose a well-drained area with indirect light and a soil temperature of at least 70°F (21°C). Dig a hole that is deep enough to cover the bulbs and place them in the hole with the sprout facing up. Backfill the hole and water the newly planted bulbs thoroughly.
6. Maintain the balance:
Once the bulbs are separated and planted, make sure to provide proper care to maintain their health and growth. Elephant ears require regular watering, but avoid overwatering as it can lead to root rot. They also prefer a balanced fertilizer product with a ratio such as 20-20-20. Additionally, be mindful of the temperature requirements, as elephant ears thrive in temperatures between 70-90°F (21-32°C).
7. Watch for problems:
Monitor the plants for any signs of problems like yellowing leaves, spots, or yellowing edges. These can be indications of underwatering, overwatering, nutrient imbalance, or other issues. If any problems arise, take appropriate measures to address them.
By following these steps and providing proper care, you can successfully separate elephant ears and grow them into healthy, thriving plants in your garden.
Separating Elephant ear in the North
Separating elephant ear plants in the North can be a bit challenging, but with the right techniques, you can successfully divide and transplant these beautiful foliage plants.
The best time to separate elephant ear plants is during the late spring or early summer when the weather is warm and there is no risk of frost. Before you begin, make sure to gather all the necessary tools, such as shears and water, as well as a suitable planting area.
Start by carefully digging around the base of the plant, making sure not to damage the bulbs. Gently lift the plant out of the ground and move it to a clean, dry area. Inspect the plant for any signs of diseases or rotting, and if there are any problems, it’s best to discard the plant.
If the plant is healthy, use a pair of shears to carefully separate the bulbs. Make sure to clean the shears with alcohol or a disinfectant before and after each cut to prevent the spread of diseases. Divide the bulbs into smaller groups, ensuring that each division has a healthy sprout and some foliage.
Prepare a new planting area for the separated bulbs. The soil should be well-drained and enriched with organic matter. Dig a hole deep enough to hold the bulbs with their roots intact. Place the bulbs in the hole, covering them with soil and gently press down to secure them.
After planting, water the area thoroughly to help the bulbs settle in their new location. The soil should be moist but not waterlogged. Throughout the growing season, make sure to water the plants regularly, especially during periods of dry weather.
To protect the newly transplanted elephant ear plants, you can create a small barrier of cardboard or plastic around the planting area. This will help retain moisture and prevent weed growth. Remove the barrier once the plants are established.
Take care of your elephant ear plants by providing them with enough light. They can tolerate partial shade to full sun, but too much shade can result in yellowing leaves. If you notice any droopy or yellowing foliage, consider moving the plant to a more sunlit area.
The North can have harsh winters, so it’s essential to prepare your elephant ear plants for the cold season. Before the first frost, cut back the foliage and carefully dig up the bulbs. Store them in a cool, dark place like a basement or cellar until the next growing season.
By following these steps, you should be able to successfully separate and transplant elephant ear plants in the North. With proper care and maintenance, these stunning foliage plants will continue to grow and thrive in your garden.


