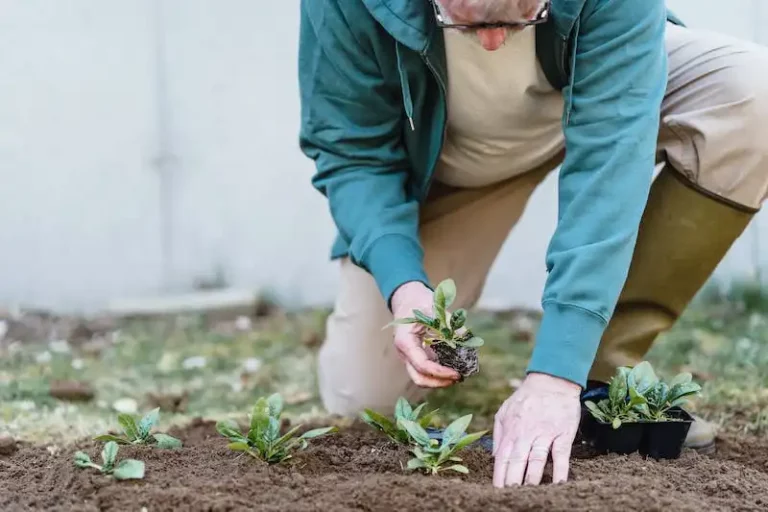
Transplanting seedlings is a crucial step in the growing process for beginner’s and experienced gardeners alike. Whether you are growing vegetables, fruits, or shrubs, it is important to properly transplant your seedlings to ensure their survival and proper growth. In this article, we will provide a step-by-step demonstration on how to safely transplant your seedlings and acclimate them to their new environment.
Step 1: Prepare your pots and soil
Before you begin transplanting, make sure you have a sufficient number of pots or containers to hold your seedlings. You can also use peat pots or blocks, which can be planted directly into the ground without disturbing the roots. Fill the pots or containers with well-draining soil and thoroughly water them.
Step 2: Gently remove the seedlings from their current containers
Carefully remove the seedlings from their current containers by gently pressing on the bottom of the pot and allowing the seedling to slide out. If the seedlings are tightly packed together, you may need to separate them by inserting a pen or similar object between them.
Step 3: Transplant the seedlings into the new pots or containers
Make a hole in the soil of the new pot or container that is slightly larger and deeper than the root ball of the seedling. Carefully place the seedling into the hole, ensuring that the roots are spread out and not cramped. Gently press the soil around the base of the seedling to secure it in place.
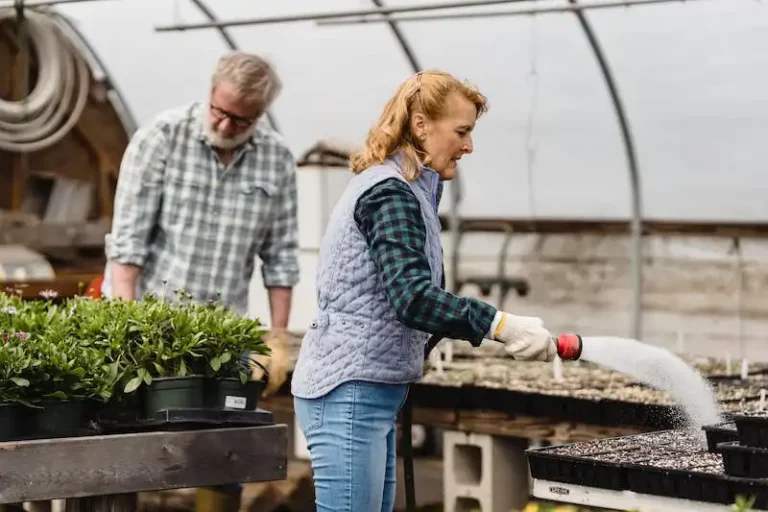
Step 4: Water the seedlings
After transplanting, thoroughly water the seedlings to help settle the soil and provide moisture to the roots. Be sure to water slowly and evenly, making sure that the entire root ball is thoroughly saturated.
Step 5: Gradually acclimate the seedlings to the outdoors
In order to prevent transplant shock and help the seedlings adjust to their new environment, it is important to gradually expose them to outdoor conditions. Start by placing the seedlings in a shaded area for a few hours each day, gradually increasing the amount of time they spend outdoors. This process, known as hardening off, helps the seedlings adapt to changes in temperature, humidity, and light levels.
Step 6: Provide proper care throughout the growing season
Once the seedlings are hardened off and have been transplanted into their final outdoor location, it is important to provide them with proper care and maintenance throughout the growing season. This includes regular watering, fertilizing, and pest control. Be sure to stay informed about any specific growing requirements for the type of plant you are transplanting.
Transplanting seedlings can be a challenging task, but with the right knowledge and preparation, you can ensure that your plants have the best chance of survival and growth. By following these step-by-step instructions and providing the necessary care, you can successfully transplant your seedlings and enjoy a bountiful harvest and beautiful garden.
For more gardening tips and tricks, be sure to download our free newsletter and stay informed about the latest techniques and trends in gardening.
“Transplanting seedlings is a crucial step in the growing process for beginner’s and experienced gardeners alike. Whether you are growing vegetables, fruits, or shrubs, it is important to properly transplant your seedlings to ensure their survival and proper growth.”
~ Sarah, gardening expert
How to transplant vegetable seedlings
Transplanting vegetable seedlings is a crucial step in the gardening process. It allows you to move your plants from their pelletized seed-starting cells to a new location where they can receive the necessary nutrients and sunlight to thrive. In this article, we will guide you through the process of transplanting vegetable seedlings effectively and safely.
To begin, ensure that your seedlings are ready to be transplanted. You can determine this by checking their size and the number of leaves they have. If they are well-established and have several true leaves, they are ready to be moved to a larger container or the outdoors.
Before transplanting, it is important to harden off your seedlings. This process involves exposing them to the outdoor environment gradually, starting with a few hours a day and gradually increasing the time over a week or so. Hardening off will help your plants adjust to the outdoor conditions and reduce the risk of transplant shock.
When choosing a location for transplanting, consider the specific needs of the vegetable you are planting. Some vegetables, like tomatoes, require full sun, while others may prefer partial shade. Also, make sure to choose an area with well-drained soil and protection from strong winds.
To transplant, first, prepare the new planting area by digging holes that are deep enough to accommodate the seedlings’ root systems. The depth should be slightly deeper than the root ball of the seedling. If you’re unsure about the proper depth, a general guideline is to place the seedling in the hole with the soil surface around the same level as it was in the original container.
Once the holes are prepared, carefully remove the seedlings from their original containers. Gently loosen the root ball, and if necessary, use a knife to separate individual seedlings. Handle the seedlings by their leaves or root ball to avoid damaging the delicate stems.
Place each seedling in a hole and fill it with soil, firming it gently around the base. Water the newly transplanted seedlings thoroughly to settle the soil and remove any air pockets.
Transplanting seedlings can be a rewarding process for both beginner and experienced gardeners. By following these steps and tips, you can ensure that your plants have a healthier start and produce bountiful vegetables throughout the growing season.
10 simple steps to transplant
When it comes to transplanting seedlings, following a few simple steps can make the process much easier and increase your chances of success. Here are 10 steps to help you transplant your seedlings safely:
- Choose the right timing: Transplanting seedlings is best done when they have developed a strong root system but before they become root-bound.
- Transplant outdoors: Transplanting your seedlings directly into their final outdoor location helps to reduce transplant shock and allows them to acclimate to the outdoor conditions.
- Harden off your seedlings: Before transplanting, gradually expose your seedlings to outdoor conditions to help them adjust. Start by placing them outside for a few hours each day and gradually increase the time over several days.
- Use pelletized starter mix: A pelletized starter mix is a convenient option for transplanting as it provides the right balance of nutrients and moisture for your seedlings.
- Fill your transplant containers: Fill your containers with the pelletized starter mix, ensuring there is enough space for your seedlings to grow.
- Start the transplant: Gently remove your seedlings from their starter trays, being careful not to damage the delicate roots. Make sure to keep the root ball intact.
- Plant your seedlings: Dig a small hole in the transplant container or outdoor garden bed and place your seedlings with the root ball intact. Fill the hole with soil and lightly press it down to ensure good contact with the roots.
- Provide protection: To protect your seedlings from harsh weather conditions, place a plastic dome or cover over them. This will help to maintain humidity and provide some protection against wind and rain.
- Ensure proper moisture levels: Keep your transplanted seedlings moist but not overly wet. Check the moisture level regularly and adjust as needed.
- Improve as you go: As you gain more experience with transplanting, you will become better at timing, proper hardening off, and providing the necessary protection for your seedlings.
By following these 10 simple steps, you can ensure a successful transplant and help your seedlings grow into strong, healthy plants.
Top 3 tips for successful transplanting
Transplanting seedlings can be a challenging task, but with the right approach, you can ensure their successful growth. Here are the top 3 tips to follow when transplanting your seedlings:
1. Timing and weather: Timing is crucial when transplanting seedlings. It’s important to wait until after the last frost date in your area to avoid exposing the plants to cold temperatures. Additionally, selecting a warm, sunny day for transplanting will help the seedlings adjust to their new environment more easily.
2. Proper hole preparation: Before transplanting, prepare the holes where the seedlings will be placed in advance. Dig holes that are wide and deep enough to accommodate the roots. Make sure to loosen the soil and remove any rocks or weeds. This will provide a better environment for the roots to grow.
3. Careful handling of seedlings: When removing the seedlings from their original container, handle them with care to avoid damaging the roots. Use a knife or your fingers to gently break apart the root-bound plants. Replant them in a potting mix that is well-draining and enriched with nutrients. Water the seedlings thoroughly after transplanting to help them settle into their new environment.
By following these tips, you can ensure that your seedlings have the best possible start in the world. It’s always important to stay informed about the specific needs of the plants you are transplanting, as these may vary depending on the type of vegetable or plant. Online resources and gardening guides can provide helpful information to keep you informed throughout the transplanting process.
Remember, transplanting can be a bit stressful for seedlings, so providing them with suitable conditions and care will result in healthier, stronger transplants. This will reduce the risk of transplant shock and increase the chances of abundant fruit or beautiful blooms in your garden.
More spring gardening posts
If you’re starting your gardening journey this spring, it’s important to stay informed and learn all the tips and tricks to ensure successful plant growth. In this section, we will discuss more topics related to spring gardening, including how to transplant seedlings safely.
Seedlings are young plants that have been grown from seeds. Before transplanting them into your garden, it’s essential to prepare them for the outdoors. Hardening off is the process of gradually exposing seedlings to outdoor conditions to make them more hardy and resilient. This process involves gradually increasing the amount of time the seedlings spend outside, starting with a short period and gradually increasing it each day.
When transplanting seedlings, it’s important to choose a suitable location in your garden. Consider the requirements of each plant species in terms of light, soil type, and moisture. Dig holes that are deep enough to accommodate the seedling’s root system and wide enough to allow proper root spreading. Before transplanting, make sure to water the seedling trays or pots thoroughly to ensure that the roots are well-moistened.
During the transplanting process, it is crucial to handle the seedlings with care. Gently remove the seedlings from their containers or trays, being careful not to damage the delicate stems and leaves. If the roots are tightly packed, loosen them slightly to encourage root growth. Place the seedlings into the prepared holes and firm the soil around them to provide stability.
After transplanting, it’s important to keep the seedlings watered and protected from harsh weather conditions. The first few days after transplanting are critical, and the seedlings will need extra care and attention. Water them frequently, especially during warm and sunny days, to prevent dehydration.
By following these steps and guidelines, you can ensure that your seedlings have a successful transplanting experience and will grow into healthy and strong plants. Remember to stay informed and read gardening guides or subscribe to newsletters to stay updated on the best practices for transplanting and caring for your plants.
For more gardening tips and insights, be sure to check out our online gardening almanac and explore other posts on different gardening topics. Happy gardening!


