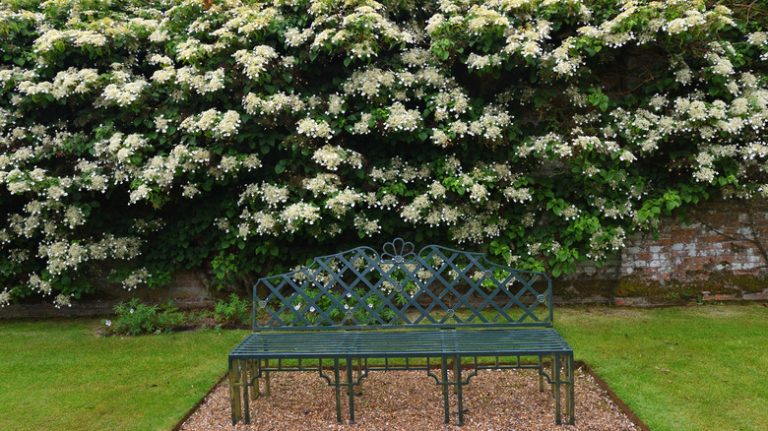
Are you a fan of azaleas? These vibrant flowers can add a pop of color to any garden. If you want to have more of these beauties in your garden, propagating azaleas is a great way to go. There are different methods of propagating azaleas, but one of the most common and easiest ways is by taking cuttings.
To start propagating azaleas, you will need some basic materials. First, you will need a clear, well-ventilated container or pot. You will also need some high-quality potting soil. Make sure the soil is well-drained to prevent root rot. Additionally, you may need some rooting hormone to help the cuttings root successfully.
When choosing the cuttings, look for healthy, young growth. The best time to take these cuttings is early summer when the stems are actively growing. It’s also important to choose a variety of azalea that is known to produce good results in propagation. Watch the azalea plant you want to propagate carefully and look for an individual stem that is growing upright and strong.
Once you have selected your cuttings, it’s time to prepare them for rooting. Take a sharp and clean pair of shears to make a clean cut just below a node on the stem. Remove any lower leaves, leaving only a few at the top. This will help the cutting conserve energy and focus on rooting rather than maintaining leaves.
After preparing the cuttings, dip the cut ends into a rooting hormone. This will help promote root development. Then, tap off any excess hormone and insert the cuttings into the potting soil. Make sure they are firmly planted and spaced evenly around the container.
To ensure the cuttings root successfully, it’s crucial to maintain a warm and humid environment. Place the container in a spot that receives bright, indirect light. You can also place a clear plastic bag over the container to create a mini greenhouse. This will help to maintain humidity levels. Monitor the soil moisture regularly and mist the cuttings if necessary.
Within a few weeks, you should start to see roots forming. Once the cuttings have established roots, you can acclimate them to a shadier spot gradually. After a few months, your azalea cuttings should be ready to be transferred to individual pots or to be planted in your garden. Remember to protect the young plants from pests and diseases, as azaleas are susceptible to them.
By following these simple steps, you can successfully propagate your own azaleas and enjoy these beautiful flowers for years to come. With a little patience and care, you can create a vibrant azalea garden that will be the envy of your neighbors.
How to grow azaleas
Propagating azaleas can be a rewarding experience. Whether you are a beginner or a seasoned gardener, growing these beautiful flowering plants is not only enjoyable but also relatively easy.
Azaleas are a type of rhododendron in the genus Rhododendron, and they are commonly found in areas with high humidity and temperate climates. They thrive in well-drained, humus-rich, and slightly acidic soil. If you’re not sure of the pH level of your soil, you can test it using a pH testing kit or consult with a local gardening expert.
When it comes to propagating azaleas, there are a few different methods you can use. One popular way is through stem cuttings. To do this, find a healthy azalea plant and take a cutting from a young, non-flowering stem. Make sure to leave a few leaves on the stem, as they will help the cutting to root.
Prepare a pot with a well-draining, peat-free soil mix. Dip the cut end of the stem in hormone rooting powder, which can be found at garden centers or easily ordered online. This will help stimulate root growth. Insert the cutting into the soil, leaving only a few inches of the stem above the surface.
Place the potted cutting in a warm and well-ventilated room, away from direct sunlight. Keep the soil consistently moist, but be careful not to overwater, as this can lead to root rot. In about a month or two, you should start to see roots developing.
Another alternative for propagating azaleas is by layering. This involves bending a low-hanging branch of the azalea plant to the ground and covering it with soil. Within a few months, roots will form where the branch touches the soil, and you can then separate the new plant from the parent plant.
After successfully growing your azaleas from cuttings or layering, it’s important to take good care of them. Azaleas prefer a location with partial shade or filtered sunlight, especially during the afternoon when the temperatures are at their highest. They also need regular watering, especially in the morning, to keep the soil moist.
If you live in a colder climate, azaleas can be grown indoors as potted plants. Just make sure to provide them with enough sunlight through a south-facing window and maintain a consistent room temperature. However, keep in mind that some azalea varieties are not suited for indoor growing.
To encourage healthy growth and flowering, it’s recommended to prune your azaleas once a year. This should be done after they have finished flowering, leaving short stems with a few leaves. Pruning helps to maintain a compact shape and stimulates new growth.
While azaleas can be susceptible to certain challenges, such as root rot and pest infestations, there are solutions available. Proper watering, well-drained soil, and a well-ventilated environment can help prevent these issues. Additionally, regularly inspecting your plants for signs of problems and promptly addressing them can ensure their long-term health.
In conclusion, growing azaleas is a rewarding endeavor that offers beautiful blooms and vibrant colors to your garden. With the right conditions, proper care, and a little bit of luck, you can successfully grow azaleas and enjoy their beauty for many years to come.
Where to plant azaleas
When it comes to planting azaleas, it’s important to choose the right location to ensure their successful growth and development. Azaleas are a type of rhododendron and have similar planting requirements, so the same guidelines generally apply to both plants.
Azaleas thrive best in slightly acidic soil with a pH between 5.0 and 6.0. To ensure proper drainage, it’s important to select a well-drained location with soil that is rich in organic matter. Avoid planting azaleas in areas with compacted soil or where water tends to collect, as they are susceptible to root rot and other problems caused by overwatering.
Azaleas grow best in areas with filtered sunlight or indirect sunlight. While they can tolerate some morning sun, too much direct sunlight can cause their delicate foliage to burn. Planting them in a spot that receives dappled shade throughout the day will help protect them from excessive sun exposure.
In terms of spacing, azaleas should be planted at least 3 to 6 feet apart to allow for proper air circulation. This helps prevent the spread of diseases and promotes healthy growth. Also, make sure to choose a planting location that offers enough space for the plant to grow wider as it matures.
Before planting azaleas, it’s important to prepare the soil properly. This involves removing any weeds or grasses from the area, loosening the soil with a garden fork or tiller, and incorporating organic matter such as compost or peat moss to improve fertility and drainage.
Once the soil is prepared, dig a hole that is about twice the width of the root ball of the azalea plant. Place the plant in the hole, making sure that the top of the root ball is level with the ground. Backfill the hole with soil, gently firming it around the roots to eliminate any air pockets.
After planting, water the azalea thoroughly and mulch around the base of the plant to conserve moisture and suppress weed growth. Azaleas require regular watering, especially during the first year after planting. Water deeply and consistently, aiming to provide about 1 inch of water per week. However, be cautious about overwatering, as azaleas are sensitive to soggy conditions.
In summary, when deciding where to plant azaleas, keep in mind the following key points:
- Choose a well-drained, slightly acidic soil
- Provide filtered or indirect sunlight
- Ensure proper spacing for adequate air circulation
- Prepare the soil by removing weeds and incorporating organic matter
- Plant the azalea at the same level as it was in its container or nursery pot
- Water regularly, but avoid overwatering
- Mulch around the base of the plant to conserve moisture
By following these steps and taking proper care of your azaleas, you can enjoy their vibrant blooms and healthy growth for many years to come.
How to plant azaleas
Planting azaleas is a simple and rewarding process. To get started, you will need to take some time to select the right variety of azalea for your garden. There are many different varieties to choose from, so do your research and find one that suits your preferences.
Once you have chosen your azalea, it is important to prepare the planting area. Azaleas prefer well-drained, acidic soil, so consider adding organic matter or a pH-neutral planting mix to improve the soil conditions. Make sure to choose a location that receives partial shade to protect the azaleas from direct sunlight.
When it comes to planting the azaleas, it is necessary to dig a hole that is twice as wide and as deep as the rootball. Carefully remove the azalea from its container, gently loosen the roots, and place it in the hole. Then, backfill with soil and firm it gently around the roots. Water the newly planted azalea thoroughly to settle the soil.
After planting, it is important to provide regular care and maintenance for your azaleas. Prune any dead or damaged branches using clean and sharp shears. Proper watering is crucial, especially during dry periods. Providing a layer of mulch around the base of the plants will help retain moisture and suppress weeds.
Azaleas are known for their vibrant and beautiful flowers. To encourage blooming, it is important to provide the plants with the right conditions. This includes proper temperature, well-ventilated areas, and appropriate fertilization. Regularly check for signs of pests or diseases and take necessary steps to overcome any issues.
Propagation of azaleas can also be done to increase your collection. This can be achieved through methods such as stem cuttings or layering. Taking stem cuttings from young and healthy plants, placing them in a rooting hormone, and providing mist and warmth can help encourage root growth. Once the roots have developed, the new plants can be planted in individual pots or trays.
In conclusion, planting azaleas requires careful selection, proper preparation of the planting area, and nurturing them through regular care and maintenance. By providing the right conditions, these beautiful plants can thrive and add a delightful touch to your garden.
How to care for azaleas
Azaleas are beautiful flowering plants that can brighten up any garden or landscape. Proper care is essential in ensuring that your azaleas stay healthy and produce vibrant blooms year after year.
Here are some step-by-step techniques for caring for your azaleas:
| Step 1: Choosing a suitable location | Find a spot in your garden that is partially shaded and has well-drained soil. Azaleas prefer a slightly acidic soil with a pH between 4.5 and 6.0. If your soil is too alkaline, you can amend it with peat moss. |
| Step 2: Planting azaleas | Dig a hole that is twice as wide as the root ball of the azalea plant and slightly less deep. Place the azalea in the hole and backfill with soil, ensuring that the top of the root ball is level with the ground. Press down gently to eliminate air pockets. |
| Step 3: Providing proper moisture | Azaleas need regular watering, especially during dry periods. Water the plants deeply but avoid overwatering, as this can lead to root rot. Mulching around the base of the plants can help retain moisture and keep the roots cool. |
| Step 4: Fertilizing azaleas | Fertilize your azaleas in early spring, using a slow-release, balanced fertilizer specially formulated for acid-loving plants. Follow the recommended dosage on the packaging to avoid over-fertilizing, which can cause damage to the roots. |
| Step 5: Pruning azaleas | Prune your azaleas after they have finished blooming to maintain their shape and encourage bushier growth. Remove any dead or diseased branches, as well as any crossing branches that could cause rubbing and potentially lead to damage or disease. |
| Step 6: Dealing with pests and problems | Azaleas can be susceptible to pests such as aphids, lace bugs, and spider mites. Regularly inspect your plants for any signs of infestation and take appropriate measures, such as using insecticidal soap or horticultural oil, to control the pests. Watch out for common problems like leaf gall and root rot, and address them promptly to prevent further damage. |
By following these care techniques, you can ensure that your azaleas grow healthy and produce stunning blooms year after year. Proper care and maintenance are crucial for the long-term success of your azalea plants.
Remember, each individual azalea variety may have its own specific care requirements, so it’s important to research and understand the needs of the specific variety you have planted. With proper care, your azaleas will thrive and add beauty to your outdoor space!


