Rutabagas are a variety of root vegetable that are part of the cabbage family. They are also known as swedes in some places. These elongated vegetables have a purple top and yellow bottom and can be harvested and eaten throughout the year. Rutabagas are easy to grow from seeds and require proper care and attention for optimal growth.
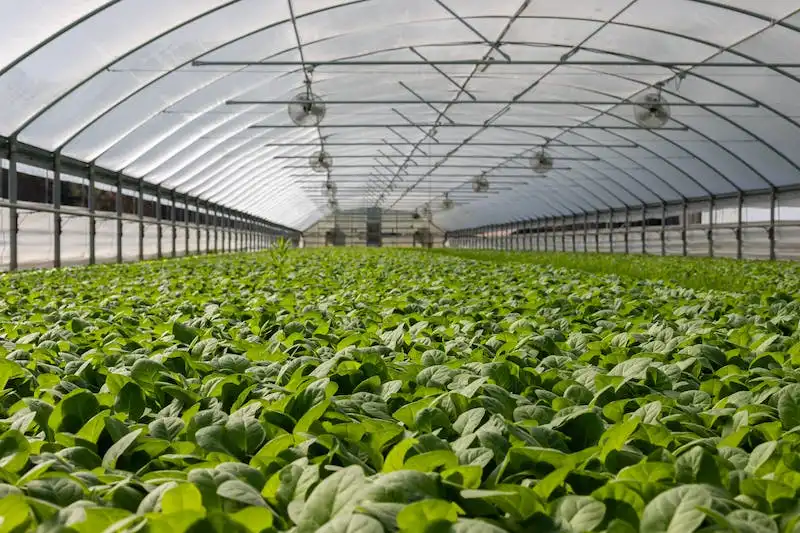
To grow rutabagas, it is important to choose a spot in the garden that receives full sunlight. They thrive in cooler areas and can withstand frost and moths better than turnips. The soil should be well-drained and free of weeds. Rutabagas need to be planted in soil that is deep enough for the roots to grow, at least six inches deep. They also need regular watering, especially in dry months.
Proper nutrition is essential for the growth of rutabagas. Adding compost or fertilizer to the soil before planting can help provide the necessary nutrients. It is also important to keep the humidity and heat levels in check to prevent diseases and bitter-tasting rutabagas. Weeds should be removed regularly to avoid competition with the rutabaga plants.
Rutabagas take about three to four months to mature and can be harvested after the leaves wilt and turn yellow. The plants should be pulled out of the ground, and the excess soil should be removed from the roots. Rutabagas can be stored for several months in a cool, dark place, such as a root cellar or a refrigerator.
In conclusion, growing rutabagas can be a rewarding experience. With proper care and attention, you can enjoy the tasty and nutritious vegetables all year round. If you are looking for a new addition to your garden, give rutabagas a try!
Growing Rutabagas in the Home Garden
Growing rutabagas in your home garden can be a rewarding experience. Rutabagas, also known as swedes, are a member of the cabbage family and are similar to turnips. These delicious root vegetables thrive in cool climates and can be easily grown in small garden spaces. If you’re interested in adding rutabagas to your garden, here are some tips to help you get started:
- Introduction: Rutabagas are cool-season vegetables that can be planted as early as March in areas with mild climates. They prefer well-drained soils with a pH between 5.5 and 7.0.
- Management: Rutabagas require plenty of sunlight, at least 6-8 hours a day. They also need regular watering, about an inch per week. Proper spacing is important to allow the roots to develop properly, so thin them to about 4-6 inches apart.
- Growing: Rutabagas take around 90 days to mature. They can be grown from seeds or transplanted seedlings. Plant the seeds about half an inch deep and keep the soil consistently moist until germination occurs.
- Companion Plants: Rutabagas are great companion plants for cabbage family vegetables like kale, broccoli, and cauliflower. They also deter insects like aphids and cabbage moths.
- Harvesting: Rutabagas are ready to be harvested when they reach a desirable size, usually around 3-4 inches in diameter. To ensure the best quality, harvest them before they become woody or develop spots. Use a garden fork or shovel to gently lift them from the soil.
- Storage: Rutabagas can be stored in a cool, dry place for up to four months. Before storing, remove any excess soil and discard any damaged or diseased roots. To prevent wilting, you can store them in a plastic bag or waxed paper.
- Cooking: Rutabagas are versatile in the kitchen and can be used in a variety of dishes. They can be boiled, roasted, mashed, or used in stews and soups. Rutabagas have a slightly sweet and nutty flavor.
By following these tips, you can enjoy a bountiful harvest of delicious rutabagas from your home garden. Whether you’re a seasoned gardener or a beginner, growing rutabagas is a rewarding and fulfilling experience.
Planting Dates
Rutabagas are cool-season biennials that are typically planted in the early spring or late summer, depending on your location. The exact planting dates will vary depending on your region, but there are some general guidelines to follow.
In general, rutabagas prefer to be planted in well-drained soil that is rich in organic matter. They also like full sunlight, so choose a location in your garden where they will receive at least 6-8 hours of direct sunlight each day. If you live in a hot climate, planting them on the north side of taller crops like corn or tomatoes can provide them with some shade during the hottest parts of the day.
Before planting, make sure to prepare the soil by removing any weeds and incorporating some compost or other organic matter. Rutabagas prefer slightly acidic soil with a pH between 5.8 and 6.8. If your soil is too alkaline, you can add some elemental sulfur to lower the pH.
The seeds can be started indoors about 4-6 weeks before the last frost date, or they can be directly sown into the ground once the soil temperature reaches around 50°F (10°C). Plant the seeds about half an inch deep and 1 inch apart, and keep the soil evenly moist until germination. Thin the seedlings to about 6 inches apart once they have two true leaves.
Rutabaga cultivars vary in their maturity times, but most can be harvested in about 90-100 days from planting. It’s important to keep an eye on the weather and harvest the rutabagas before the first hard frost. In warmer climates, you may be able to leave them in the ground until they reach their full maturity.
Rutabagas can be prone to diseases like damping-off, so it’s important to practice good crop rotation and keep the garden free of weeds. Regular irrigation, especially during dry periods, can help ensure good growth and prevent the roots from becoming woody or bitter. Harvesting rutabagas when they are still small will also help improve their flavor and texture.
In colder climates like Canada or New Zealand, where the growing season is shorter, it’s recommended to plant rutabagas in the early spring to ensure a high-quality harvest. In more moderate climates, rutabagas can be planted in both the spring and fall for additional harvests.
When harvesting rutabagas, it’s important to cut off the leafy tops, as they tend to become bitter once the roots are harvested. Rutabagas can be stored in a cool, dark place for several weeks, but they will keep even longer if stored in a root cellar or refrigerator.
In summary, planting dates for rutabagas depend on your location and climate. Generally, rutabagas are planted in early spring or late summer. Follow the preparation tips mentioned above to ensure a successful rutabaga harvest. With proper care and attention, you can enjoy a bountiful harvest of these delicious and fiber-rich root vegetables.
Soils and Fertilization
When it comes to growing rutabagas, the right soil and proper fertilization are essential for a successful harvest. Rutabagas are root vegetables that require a thick, well-draining soil with a pH level between 6.0 and 6.8. They prefer deep, cool soils that are rich in organic matter.
Before planting rutabagas, it is important to prepare the soil properly. Start by clearing the planting area of any weeds or other unwanted vegetation. Then, loosen the soil to a depth of about 8 to 10 inches and remove any rocks or debris. Adding compost or well-rotted manure will help improve soil fertility and provide necessary nutrients.
When it comes to fertilization, rutabagas are heavy feeders and require regular applications of fertilizer throughout their growing season. Prior to planting, it is beneficial to apply a balanced fertilizer with equal amounts of nitrogen, phosphorus, and potassium. This will provide the necessary nutrients for the plant’s initial growth. As the plant continues to grow, side-dress applications of nitrogen-rich fertilizer can be applied every three to four weeks.
It is important to mention that rutabagas grown in New Zealand have slightly different fertilization requirements. Due to the acidic nature of their soils, it is recommended to test the soil pH and adjust accordingly. Adding lime to raise the pH level can help ensure proper nutrient uptake for the plants.
When it comes to pests and diseases, rutabagas are generally hardy and resistant to most common pests and diseases. However, they can still be susceptible to some problems. Common pests include flea beetles, aphids, and cabbage loopers. Planting companion herbs such as thyme or dill can help deter these pests.
Harvesting rutabagas should be done after a light frost, as this enhances their flavors. The size of the rutabagas can vary, but generally, they should be about 3-4 inches in diameter. To harvest, gently pull the rutabaga tops to loosen the soil and then use a garden fork or shovel to lift the rutabagas out of the ground. Remove any excess soil and store the rutabagas in a cool, dark place with temperatures between 32-40°F for up to 4-6 months.
In conclusion, growing rutabagas requires proper soil preparation and fertilization. Choosing the right cultivars, controlling pests, and providing adequate nutrition are all important factors in achieving a successful harvest. By following these tips and guidelines, you can enjoy the delicious and nutritious flavors of rutabagas in your dishes throughout the year.
Planting and Spacing
When it comes to planting rutabagas, there are a few factors to consider to ensure successful growth. First, make sure to start with healthy plants. You can either buy young plants from a local store or grow them from seeds. It’s important to note that rutabaga plants do not flower, so you won’t find them in the flower section.
The best time to plant rutabagas depends on your location and the variety you choose. In general, rutabagas are planted in early spring, around March, when the soil is workable, and there is no more risk of frost. However, you can also plant them in late summer for a fall harvest.
The spacing of rutabaga plants is crucial for their growth and productivity. As a general rule, plant them about 8-12 inches apart, allowing enough room between plants for them to develop their roots without competition. This spacing will ensure that the rutabaga roots have enough room to grow into a nice size. If your plants are too close together, the roots won’t have enough space to grow properly, resulting in smaller yield. However, if they are too far apart, you may end up with less productivity per square foot.
Rutabagas require full sunlight to grow well, so choose a spot in your garden that receives at least 6-8 hours of direct sunlight per day. They also prefer cool weather, so planting them in early spring or late summer is ideal. Rutabagas are not very demanding when it comes to soils, but they do best in well-draining soils with a pH range of 6.0-6.8. Before planting, make sure to prepare the soil by removing any weeds and loosening it with a garden fork or tiller.
During the growing season, rutabagas need regular watering, especially during dry spells. Avoid overwatering, as this can lead to root rot. Aim to keep the soil moist, but not waterlogged. To retain moisture and control weeds, mulch the soil around the plants. Also, consider applying a balanced fertilizer to provide the necessary nutrients. Avoid over-fertilizing, as it can lead to excessive foliage growth and poor root development.
Rutabagas are generally less prone to insect and disease problems compared to turnips, but they can still attract pests like cabbage loopers and flea beetles. To protect your plants from these pests, you can cover them with floating row covers or use organic insecticides if necessary.
As your rutabaga plants develop, you may notice that the roots begin to bulge above the ground. This is a sign that the rutabagas are ready for harvest. To harvest, gently pull the rutabagas out of the ground and store them in a cool, dark place with high humidity. They will keep for several months if stored properly.
In summary, planting and spacing rutabagas correctly is essential for a successful growing season. Make sure to provide enough sunlight, choose the right spot with well-draining soil, and maintain regular watering and fertilizing. Additionally, keep an eye out for pests and diseases and take appropriate measures to protect your plants. With proper care and management, you’ll soon be enjoying delicious rutabagas from your own garden.


