If you’re a gardening enthusiast, you’ve probably heard of Anaheim peppers. These unique peppers, also known as New Mexico chiles, are a favorite among home gardeners for their mild heat and versatile flavor. Whether you’re a beginner or an expert, this complete guide will teach you everything you need to know about growing Anaheim peppers in your own garden.
First, let’s talk about the basics. Anaheim peppers are heat-tolerant and can be grown in most climates, as long as the temperature doesn’t drop below 60°F (15.6°C). In order to get started, you’ll need Anaheim pepper seeds or seedlings. If you’re starting from seeds, it’s recommended to start them indoors about 8-10 weeks before the last frost date in your area. However, if you want to get a head start or have a short growing season, you can also purchase established seedlings from a local nursery.
When it comes to planting, Anaheim peppers can be planted directly in the garden or in containers. If you’re using containers, make sure they have drainage holes and are at least 12 inches (30.5 cm) deep. This will allow the roots to grow deep and ensure a healthy plant. If you’re planting in the garden, choose a spot that receives full sunlight and has well-draining soil. Anaheim peppers need at least 6-8 hours of direct sunlight per day to thrive.
Once your Anaheim peppers are planted, it’s important to take care of them properly. Water the plants regularly, making sure the soil is consistently moist but not waterlogged. During hot and dry periods, you may need to water more frequently. In addition, it’s a good idea to mulch around the plants to help retain moisture and suppress weed growth.
In terms of fertilization, Anaheim peppers are not heavy feeders. A balanced fertilizer, such as a 10-10-10 or 14-14-14, can be applied once every 4-6 weeks. Be careful not to over-fertilize, as this can lead to excessive foliage growth and fewer peppers.
As your Anaheim peppers begin to grow, you’ll notice that they start off green and then turn red as they mature. It’s important to wait until the peppers are fully ripe before harvesting. This is when they have the best flavor and heat profile. To harvest the peppers, simply twist them off the plant or use a pair of scissors or garden shears.
Once harvested, Anaheim peppers can be used in a variety of dishes. They are commonly used in Mexican and Southwestern cuisine, and can be roasted, stuffed, or added to salsas and sauces. However you choose to use them, Anaheim peppers will surely add a unique and delicious flavor to your recipes.
In conclusion, growing Anaheim peppers can be a rewarding experience for any gardener. If you follow the steps outlined in this complete guide, you’ll be well on your way to harvesting a bountiful crop of these flavorful peppers. So why not give them a try this growing season? Join our newsletter to get expert gardening tips and receive exclusive offers on gardening supplies. Happy growing!
Anaheim Peppers shriveling 666681
If you’ve planted Anaheim peppers in your garden and noticed that they are shriveling up, you may be wondering what’s causing this. There are a few possible reasons why Anaheim peppers may shrivel, and in this complete guide, we will take a closer look at this issue and provide expert advice on how to prevent it.
One of the most common reasons for Anaheim peppers shriveling is a lack of water. These peppers need regular watering, especially during hot summer months. Make sure to water them deeply and consistently to keep the soil moist. However, be careful not to overwater, as this can lead to other issues such as root rot.
In addition to watering, sunlight is another crucial factor for healthy Anaheim peppers. Make sure your plants get at least 6-8 hours of direct sunlight each day. If you’re growing them in pots, place the pots in a sunny spot or use artificial grow lights to provide adequate light.
Fertilization is also important for the health of Anaheim peppers. Use a complete fertilizer with a balanced NPK ratio to provide essential nutrients to the plants. Follow the instructions on the fertilizer packaging for the best results.
Another potential cause of shriveling peppers is heat stress. Anaheim peppers are heat tolerant, but extreme heat can still affect their growth. Providing shade or using shade cloths during the hottest parts of the day can help protect the plants from excessive heat.
If you notice that the peppers are still shriveling even with proper watering, sunlight, and fertilization, pests or diseases may be the culprit. Check the plants for signs of pests such as aphids or diseases such as blossom end rot. In such cases, it may be necessary to use appropriate pesticides or treatments to address the issue.
In conclusion, if your Anaheim peppers are shriveling, make sure to assess their watering, sunlight, and fertilization needs. Address any issues in these areas, and monitor the plants for pests or diseases. With proper care, you should be able to grow healthy and abundant Anaheim peppers in your garden.
If you’re interested in learning more about growing Anaheim peppers and other gardening tips, join our newsletter for expert advice and helpful links. Simply provide your email address and sign up to receive our newsletter regularly. We also welcome any questions or concerns you may have, so feel free to reach out to us via phone or email. Happy gardening!
| Phone: | XXX-XXX-XXXX |
| Email: | info@example.com |
Expert Response
If you want to grow Anaheim peppers, you’re in luck! They are relatively easy to grow and can produce an abundant harvest if you follow the right steps.
Firstly, you need to find a suitable location for your Anaheim pepper plants. They require a lot of sunlight, so choose a spot in your garden that gets at least 6-8 hours of direct sunlight per day. If you don’t have a garden, you can still grow Anaheim peppers in pots or containers, as long as they get enough sunlight.
When it comes to soil, Anaheim peppers are not too picky. They can grow in most types of soil as long as it is well-draining and enriched with organic matter. If your soil is heavy or clay-like, you can improve it by adding compost or aged manure to it.
Before planting your Anaheim pepper seedlings or seeds, make sure all chances of frost have passed. They are sensitive to frost and won’t survive if exposed to freezing temperatures. In addition, it’s a good idea to harden them off before planting. This means gradually exposing them to outdoor conditions over a period of 1-2 weeks.
When it’s time to plant, dig a hole that is deep enough to hold the root ball of your pepper plant. Place the plant in the hole and backfill with soil, making sure to gently firm it around the base of the plant. Space your Anaheim peppers about 12-18 inches apart if planting in the ground, or choose a large enough container if planting in pots.
Watering is an important aspect of growing Anaheim peppers. They need consistent moisture, but be careful not to overwater them as it can lead to root rot. Water deeply once a week, or more often in hot and dry weather. Mulching can help to retain moisture and suppress weed growth.
Fertilizing your Anaheim peppers will help them grow and produce more fruit. Use a balanced fertilizer, following the instructions on the package. Be sure to water the plants well after applying the fertilizer to avoid burning the roots.
As your Anaheim peppers grow, you may need to provide support if they become top-heavy or start to droop. You can use stakes or cages to keep them upright and prevent the branches from breaking.
In terms of pests and diseases, Anaheim peppers are relatively tolerant. However, you should keep an eye out for common garden pests like aphids and caterpillars. If you notice any signs of damage, treat the plants with organic or chemical pesticides according to the instructions on the label.
Harvesting Anaheim peppers is an exciting part of the process. Most varieties will start producing fruit about 70-80 days after planting. The peppers are ready to be harvested when they reach a bright green color and are about 6-8 inches long. You can harvest them at this stage for a milder flavor, or wait until they turn red for a hotter taste.
In conclusion, growing Anaheim peppers can be a rewarding experience. With proper care and attention, you can enjoy a bountiful harvest of these flavorful peppers. If you’re interested in learning more about gardening, be sure to join our newsletter for more expert tips and helpful resources.
How to Grow Anaheim Peppers – The Complete Guide
Anaheim peppers, also known as New Mexico chiles, are a popular variety of pepper that is commonly used in Southwestern cuisine. If you are interested in growing your own Anaheim peppers, this complete guide will provide you with all the information you need to get started.
1. Choose the Right Location: Anaheim peppers require plenty of sunlight, so make sure to choose a location that receives at least 6-8 hours of direct sunlight each day.
2. Get the Right Soil: Anaheim peppers prefer well-draining soil, so make sure to amend your garden soil with compost or peat moss to improve drainage. Additionally, adding some fertilizer to the soil before planting will provide the peppers with the necessary nutrients to thrive.
3. Start Seeds Indoors: Anaheim peppers can take a long time to grow, so it is recommended to start the seeds indoors 8-10 weeks before the last frost date. Plant the seeds in small pots or containers filled with seed-starting mix, and keep them in a warm and sunny location.
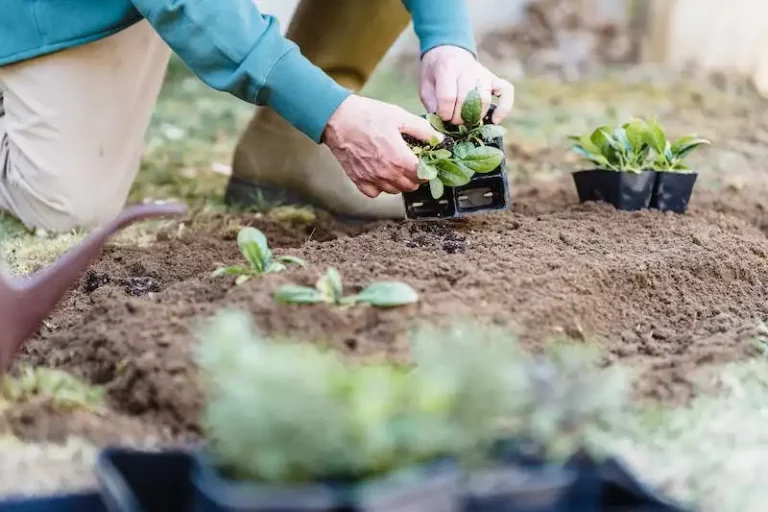
4. Transplant Seedlings: Once the seedlings have grown to about 2-3 inches tall and have developed several sets of leaves, they can be transplanted into larger pots or directly into the garden. Make sure to space the plants at least 18-24 inches apart to allow for proper air circulation.
5. Water Regularly: Anaheim peppers require regular watering, especially during dry spells. Make sure to water the plants deeply, providing enough water to moisten the soil to a depth of at least 6 inches. Avoid overwatering, as this can lead to root rot.
6. Provide Support: As the Anaheim pepper plants grow, they may need support to prevent them from bending or breaking under the weight of the fruit. You can use stakes or cages to provide support to the plants.
7. Harvest the Peppers: Anaheim peppers can be harvested when they reach their desired size and color. Most Anaheim peppers are green when immature and turn red when fully ripe. It is best to harvest the peppers when they are still firm and before they start to shrivel.
8. Enjoy your Harvest: Once you have harvested your Anaheim peppers, you can use them in a variety of dishes, from salsas and sauces to stuffed peppers and more. Experiment with different recipes to make the most of your homegrown peppers!
In addition, if you would like to stay updated on the latest gardening tips and tricks, consider joining our newsletter. As a subscriber, you will receive expert advice and helpful resources straight to your email or phone.
So now that you have all the information you need, it’s time to get started on growing your own delicious Anaheim peppers. Follow these steps and enjoy the bountiful harvest of these flavorful and heat-tolerant peppers!


