Gourds, which belong to the Cucurbitaceae family, are versatile and easy to grow. They come in many shapes, sizes, and colors, ranging from small ornamental varieties to larger gourds used for crafting and decorating. Growing gourds is a rewarding experience that can be done by anyone, regardless of their gardening experience. In this guide, we will take you through the steps of planting, caring for, and harvesting gourds, so you can enjoy the beauty and uniqueness of these amazing plants.
Before you begin, it’s best to learn about the different types of gourds and choose the ones that suit your needs and preferences. There are vining gourds, which need support, and bush varieties, which can grow on the ground without support. Popular gourd varieties include the Martin gourd, which is commonly used as birdhouses, and the Purple Martin gourd, which attracts these birds. Once you have decided on the type of gourd you want to grow, it’s time to get started.
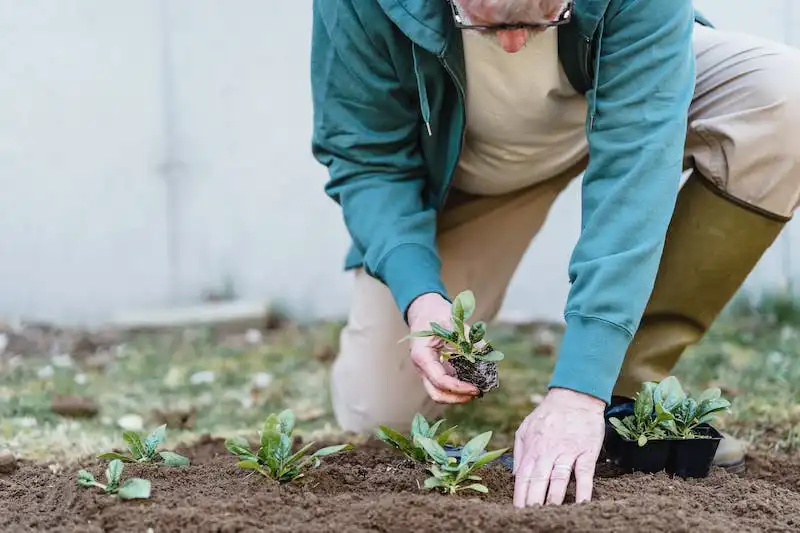
The first step in growing gourds is to properly prepare the soil. Gourds prefer well-draining soil that is rich in organic matter. Choose a sunny spot in your garden and dig a hole where the gourd seeds will be planted. Before planting, it’s a good idea to add compost or well-rotted manure to the soil to provide additional nutrients. Once the soil is prepared, you can plant the gourd seeds. The seeds should be planted about an inch deep and at least two feet apart.
When it comes to caring for your gourd plants, there are a few important things to keep in mind. Gourds require regular watering, especially during hot weather, and it’s important to monitor the soil moisture closely. Mulching around the plants can help conserve moisture and suppress weeds. Gourd plants are also prone to pests and diseases, so it’s important to treat any problems that arise. Regularly inspect the plants for signs of pests or diseases, such as wilting leaves or green worms, and take appropriate measures to stop their spread.
As the gourd plants grow, you may need to provide support for the vining varieties. You can use posts, trellises, or even DIY structures to support the vines. This will prevent the gourds from sitting on the ground, which can lead to rotting and pests. Additionally, pruning the plants is important to encourage air circulation and prevent diseases. Use shears to remove any dead or damaged stems and leaves. This will help keep the plants healthy and productive.
Once your gourds are mature and ready for harvest, there are a few key things to keep in mind. Gourds are typically harvested when the stems attached to them are dry and brown. To harvest, use shears to cut the stems about two inches above the gourds. Be sure to handle them carefully, as they can bruise easily. After harvesting, the gourds should be cleaned with a soft brush and stored in a cool, dry place to prevent rotting. Storing the gourds properly will ensure that they last for several months and maintain their vibrant colors.
In conclusion, growing gourds is a fun and rewarding experience that can be enjoyed by gardeners of all skill levels. By following the proper planting, caring, and harvesting steps, you can have a bountiful gourd harvest and enjoy their beauty and versatility. Hopefully, these tips and insights will help you get started on your gourd-growing journey. Good luck!
Growing Gourds: How to Plant, Grow, and Harvest Gourds
Gourds are a versatile and fascinating addition to any garden. From their long history of use as containers and tools to their unique shapes and vibrant colors, growing gourds is a rewarding experience. Whether you’re looking to cultivate large, hard-shell gourds for crafting or small, edible varieties for recipes, this guide will walk you through the steps to successfully plant, grow, and harvest gourds.
Planting Gourds
Gourds, which come from the Cucurbitaceae family, thrive in warm-season growing conditions. Before planting, it’s important to prepare your garden bed by adding plenty of compost or well-rotted manure for a humus-rich soil. Gourds also prefer a full sun location with good drainage.
When it comes to picking your gourd seeds, you have many options. They come in various sizes, shapes, and colors. Some popular varieties include birdhouse gourds, which are often used for crafting, and lagenaria gourds, which are known for their hard-shell and intricate shapes.
Once you have selected your seeds, plant them in a hole that is about an inch deep. If you’re planting multiple gourds, make sure to leave enough space between them as they tend to vine and require room to spread out.
Growing Gourds
After planting, water your gourds regularly to keep the soil moist. Gourds are heavy feeders, so you may need to provide additional fertilizer during the growing season. To give your plants some support, you can consider using a trellis or other structures.
Gourds are pollinated by bees and other insects, so it’s important to provide a companion planting of flowers nearby to attract pollinators. This will increase your chances of a successful harvest.
Be aware that gourds can be prone to various problems, such as bugs and diseases. Keep an eye out for any signs of damage or wilting leaves and address these issues promptly to prevent further damage.
Harvesting Gourds
Gourds take a long time to mature, so be patient. Depending on the variety, it may take 80-100 days or even longer for the gourds to reach their full size and color. Once the gourds start to turn yellow or white and the vines begin to die back, they’re ready to be picked.
To harvest gourds, simply cut the stems leaving a few inches attached to the fruit. Be careful not to damage the skin as this can lead to bacterial or fungal infections during drying and storage.
Tip: If you’re unsure whether a gourd is fully ripe, you can do a small test by pressing your thumbnail onto the skin. If it leaves a dent, the gourd is not ready. If it doesn’t leave a dent, it’s time to harvest!
Once picked, clean the gourds by wiping away any dirt or debris. Then, let them dry in a well-ventilated area with good airflow for several weeks. This will help to further harden the shell and prevent any mold or rot.
Now that you know the steps to growing gourds from seed to harvest, you can enjoy the many uses and benefits these unique plants have to offer. Whether you’re interested in crafting, decorating, or cooking, gourds are a wonderful addition to any garden.
Gourd Plant Info
If you’re a gourd grower or want to become one, it’s important to have some gourd plant info. Gourds are part of the Cucurbitaceae family, which includes cucumbers, squash, and pumpkins. They come in many types, such as Lagenaria and Cucurbita. Gourds are usually planted in the spring, once the danger of frost has passed, and they are left to grow through the summer and fall.
Gourd plants are hardy and can tolerate neglect, but they do require some care. They need warm soil and plenty of sunlight. Gourds are heavy feeders, so it’s important to provide them with rich soil. Work some compost or well-rotted manure into the soil before planting to give them a good start. Gourds also benefit from mulch, which helps to retain moisture and prevent weed growth.
Gourd plants have long vines that can be trained to grow in a desired direction. If they start to take over your garden, you can train and trim them to keep them under control. You can use cages or trellises to support the vines so they don’t spread out too much.
Gourds are usually grown from seed, which should be started inside about four weeks before the last frost date. Plant the seeds about an inch deep and keep them warm and moist until they germinate. Once the seedlings are about six inches tall, they can be transplanted outside. Make sure to space them about three feet apart to give them enough room to grow.
Gourd plants have large, heart-shaped leaves that provide shade to the fruits. This can protect the gourds from sunburn and help prevent them from turning yellow and rotting. However, it’s important to rotate the gourds so that they receive even sunlight. If the gourds are left on the ground, place a piece of wood or cardboard under them to prevent decay.
Gourds take a long time to mature, usually around three to six months. They can be harvested once the stem starts to dry and turn brown. Gourds should be cut from the vine, leaving about an inch of stem attached. They can be stored in a warm, dry area to cure for several weeks. During this time, the skin will harden and the gourds will become more durable.
Gourds have a wide variety of uses and can be both decorative and utilitarian. They can be carved and made into bowls, birdhouses, or even instruments. Gourds with hard-shell skins are better for long-term use and can be painted or decorated. Some gourds, like the Lagenaria varieties, can also be dried and used as containers or made into beautiful lamps. You’re only limited by your imagination!
In conclusion, gourd plants are an interesting and versatile addition to any garden. They are easy to grow and require minimal care, making them perfect for both experienced and novice gardeners. So why not give them a try and see what amazing things you can create with your very own homegrown gourds!
How to Grow Gourds
Gourds are fascinating plants that can be easily grown in your own garden or even in containers. Here’s a step-by-step guide on how to grow gourds:
- Choose the right type: Determine the type of gourd you want to grow. There are many varieties available, including ornamental and edible ones. Some popular types are calabash, bottle gourd, and birdhouse gourd.
- Prepare the soil: Gourds prefer well-drained soil with a pH level between 6 and 7. Before planting, enrich the soil with compost or aged manure to provide the necessary nutrients.
- Sow the seeds: Gourds are usually grown from seeds. Plant the seeds directly in the ground or in containers, depending on the available space. Make sure to give them enough room to spread and grow.
- Care for the plants: Gourds require proper care to thrive. They need full sun, regular watering, and occasional fertilizing. Keep an eye on pests and diseases, and take necessary steps to control them.
- Provide support: As gourds grow, they develop long vines that need support. You can use trellises, fences, or stakes to support the vines and prevent them from overtaking other plants.
- Harvest the gourds: The time it takes for gourds to mature and be ready for harvest varies depending on the type. Generally, gourds should be harvested before the first frost. Cut them from the vine, leaving a few inches of stem attached.
- Store the gourds: Gourds should be stored in a cool, dry place for a few weeks to fully dry. This will help them last longer and prevent mold or rot. Once dried, you can use gourds for various purposes, such as crafting or decorations.
Growing gourds can be a rewarding experience. Whether you want to enjoy their ornamental beauty or use them for practical purposes, following these steps will help you successfully grow your own gourds.


