If you’ve ever started a garden, you know there’s something truly magical about planting a tiny seed and watching it grow into a thriving plant. Whether you’re a seasoned gardener or just starting out, growing plants from seed is a deeply rewarding and fulfilling experience. Plus, it’s a great way to save money and have a wider selection of plants to choose from.
To get started, you’ll need a few basic supplies. First and foremost, you’ll need seeds – you can choose from a wide variety of seeds online or at your local garden center. Next, you’ll need pots or containers to plant your seeds in. It’s best to use eco-pots made from biodegradable material like peat or compostable plastic, as they can be planted directly into the ground without disturbing the roots of your seedlings.
Before you sow your seeds, it’s important to prepare the potting soil. Make sure it’s moist but not soggy, as excessive moisture can lead to fungal growth or rot. You can also add some organic fertilizer to give your seeds a healthy start. Once your soil is ready, plant your seeds according to the instructions on the seed packet – some seeds need to be planted deep, while others should just be lightly covered with soil.
Once your seeds are planted, you’ll need to provide them with the right conditions for germination. Most seeds germinate best in warm temperatures and bright, sunny locations. It’s essential to keep the soil consistently moist but not waterlogged. A mist sprayer can help you keep the humidity levels high without overwatering. It’s also important to provide proper ventilation to prevent the buildup of excessive moisture, which can lead to fungal diseases.
As your seeds start to sprout, you’ll need to provide them with adequate light. A sunny windowsill can work, but if you don’t have access to enough natural light, consider using specialized grow lights. These lights mimic natural sunlight and can be easily set up indoors. It’s important to keep the lights about 2-4 inches above the plants to prevent them from becoming leggy.
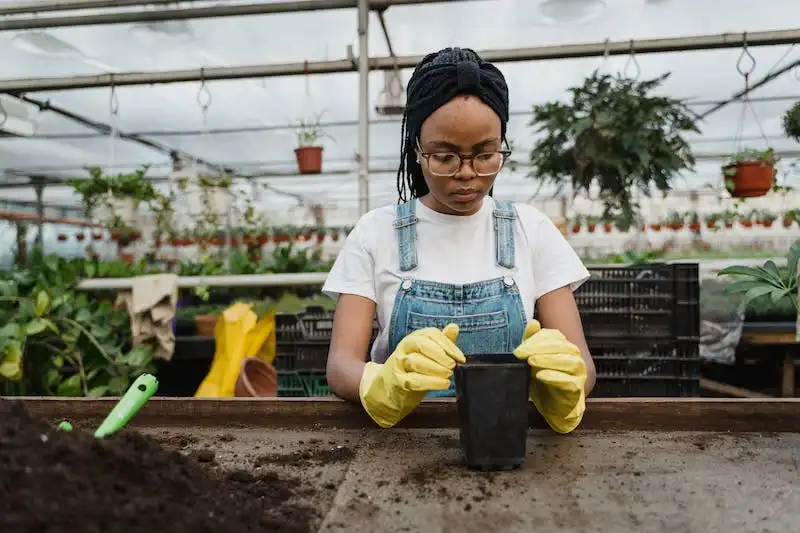
Once your seedlings have grown a few sets of true leaves – these are the leaves that come after the cotyledons – it’s time to transplant them into larger pots or directly into the garden. Make sure to handle the seedlings gently by the leaves, as grasping them by the stem can damage the delicate roots. After transplanting, give your seedlings a thorough watering to help them settle into their new environment.
To keep your plants healthy and thriving, regular fertilizing is essential. You can use a liquid or granular fertilizer, following the package instructions for dilution rates or amounts. Additionally, keep an eye on your plants’ water needs and adjust the watering accordingly. Overwatering can lead to root rot, while underwatering can cause stress and wilting. It’s also important to monitor the humidity levels, especially if you’re growing plants indoors. You can use a humidity tray or a small bowl filled with water to increase the moisture levels around the plants.
Overall, growing your own plants from seed is an exciting and rewarding process. It allows you to have full control over the entire life cycle of your plants, from seed to harvest. Plus, it’s a great way to connect with nature and enjoy the fruits of your labor. So, why not give it a try and start growing your own plants from seed today?
Starting Seeds Indoors
Starting seeds indoors is a great way to get a jump start on the growing season. It allows you to start your plants earlier than if you were to sow them directly into the garden. Additionally, starting seeds indoors gives you more control over the growing conditions and helps you to avoid potential issues like pests and diseases.
Before you start, make sure you have all the necessary supplies. You will need containers, such as seed trays or eco-pots, that can contain the soil and allow for proper draining. You will also need a good quality seed starting medium, which provides the right nutrients and moisture for seedling growth.
When choosing seeds to start indoors, consider what type of plants you would like to grow and what growing conditions they require. Some plants, like vegetables, require full sun and warm temperatures. Others, like melons, can tolerate slightly cooler temperatures.
Once you’ve got your supplies and seeds, it’s time to start sowing. Fill your containers with the seed starting medium and moisten it. Follow the instructions on the seed packets for how deep to sow the seeds. Some seeds need to be planted deep, while others just need to be lightly covered with soil.
After sowing the seeds, cover the containers with a plastic dome or plastic wrap to create a mini greenhouse effect. This will help to maintain the moisture and temperature levels needed for germination. Keep the containers in a warm, well-lit area indoors. If you don’t have access to natural sunlight, you can use artificial lights to provide the necessary light for the seedlings.
As the seeds start to sprout, remove the plastic covering and place the containers in a well-ventilated area. This will help the seedlings to strengthen and avoid fungal diseases. Make sure to water the seedlings regularly, keeping the soil moist but not waterlogged.
Once the seedlings have grown their first true leaves, they can be moved to individual containers or trays to allow for more space and nutrients. This process, known as “transplanting,” helps the seedlings develop a strong root system.
After transplanting, continue to care for the seedlings by providing them with adequate light, water, and nutrients. You can follow the instructions on the seed packets or consult gardening resources like books or reputable online sources for specific care guidelines.
When the outdoor temperatures start to warm up and there is no longer a risk of frost, you can begin the hardening off process. Hardening off is the process of gradually acclimating the seedlings to the outdoor environment. Start by placing the seedlings outside for a few hours a day, gradually increasing the amount of time they spend outdoors. This will help them adjust to the fluctuating temperatures and intensity of sunlight.
Once the seedlings are fully hardened off, they can be planted into the garden or containers. Make sure to choose a location that provides the right growing conditions for the specific plants you are growing.
Starting seeds indoors may require some additional time and effort, but it can be a rewarding and cost-effective way to grow your own plants. By following these simple steps and staying organized, you can increase your chances of success and have healthy, thriving transplants ready for the growing season.
Sources:
Image source:
Growing your own transplants from seeds
If you’re looking to save money and have more control over the plants in your garden, growing your own transplants from seeds is the way to go. It’s also a rewarding and educational process that allows you to fully appreciate the life cycle of a plant.
To get started, you’ll need to prepare your seeds. Make sure you’re using high-quality seeds that can be found at your local garden center or online. Seeds can contain a lot of energy, so make sure to plant them in the right conditions to maximize germination success.
Before taking the seeds out of their packets, read the instructions on the back to see what’s recommended for planting depth and spacing. Then, fill a seed tray or small containers with seed-starting mix. Plant the seeds at the appropriate depth and cover them lightly with soil.
Once your seeds are planted, it’s important to keep the soil evenly moist. You can do this by placing a clear plastic cover over the tray or container to create a mini greenhouse. Just make sure to open it up daily to prevent fungal diseases and to allow for airflow.
As the seeds start to sprout and grow, you’ll need to provide them with enough light. A grow light or a sunny window will do the trick. Keep the light source just a few inches above the seedlings to prevent them from getting leggy.
As the plants continue to grow, you may need to transplant them into larger containers to give their roots more room to spread out. This process is known as “potting up.” Make sure to do this earlier rather than later to avoid transplant shock.
Once the weather begins to warm up and there’s no danger of frost, you can start hardening off your transplants. This means gradually exposing them to the outdoor conditions by placing them outside for a few hours each day. Start with a shady spot and gradually increase their exposure to sunlight and outdoor elements.
Before transplanting your seedlings into the garden, it’s important to know your last frost date and the specific needs of the plants you’re growing. Some plants are more sensitive to cold temperatures and need to be planted after the risk of frost has passed.
Now that your transplants are ready to be moved into the garden, make sure to prepare the planting area well. Clear out any weeds and break up the soil to create a loose bed. Dig a hole deep enough to accommodate the roots of your seedlings and gently place them in the hole, making sure to bury them up to their first set of true leaves.
Transplant shock can be a common issue when moving plants from indoors to outdoors, so make sure to water your transplants well and keep an eye on them in the first few days.
With these tips, you’ll be growing your own transplants from seeds successfully in no time. Not only will you have a bountiful garden, but you’ll also have the satisfaction that comes with knowing you did it yourself.
When to plant vegetable seeds indoors
If you want to start your own vegetable garden, planting seeds indoors can be a great way to get started. By doing so, you can germinate seeds in a controlled and organized environment before transplanting them outdoors.
When choosing when to plant vegetable seeds indoors, it’s important to consider the specific instructions provided on the seed packet or online. Different vegetables have different germination times and requirements. In general, starting seeds indoors allows you to get a head start on the growing season, especially if you live in a region with a short growing season or cold temperatures.
In order to start your seeds indoors, you will need to fill containers with seed-starting soil. It’s important to fill the containers to the top, as this prevents the soil from becoming too soggy. Follow the instructions on the seed packet to determine the depth at which you should plant the seeds.
Once you’ve filled the containers with soil, carefully place the seeds on the soil surface, taking care not to plant them too deep. The seeds should be lightly covered with soil, and you can use your finger or a small tool to gently press them into place. It’s a good idea to mark the containers with the planting dates, as this allows you to keep track of when to expect germination.
After planting the seeds, they will need to be kept in a warm and well-lit location. Most seeds require temperatures between 60 and 85 degrees Fahrenheit to germinate, so make sure to provide the necessary warmth. You can use heating mats or fluorescent lighting to provide the right amount of heat and light.
While waiting for the seeds to germinate, it’s important to regularly check the soil moisture and water as needed. However, make sure not to overwater the containers, as this can lead to damping-off disease. It’s also a good idea to read up on the specific care instructions for the vegetables you are growing, as they may have specific requirements for watering and lighting.
Once the seeds have germinated and grown their first true leaves, they are ready to be thinned. This allows the remaining seedlings to have enough space to grow. Thinning involves removing the weaker seedlings, usually leaving one or two of the strongest ones per container.
Transplanting the seedlings outdoors can usually be done when the temperature and weather conditions are appropriate for the specific vegetable. The seed packets or online resources can provide you with the information you need to choose the right time for transplanting. This step is important to ensure that your vegetables thrive in their new environment.
Overall, starting vegetable seeds indoors can be a great way to get a head start on your garden and ensure that your plants have a better chance of producing a bountiful harvest. If you need additional information or have specific questions, it’s a good idea to reach out to your local garden centers or consult online resources like gardening websites or the Farmer’s Almanac.


