If you have a tree philodendron that has outgrown its current pot, or if its growth has slowed and it’s not looking as healthy as it once did, it may be time to repot it. Repotting your tree philodendron is essential to ensure it has enough room for its growing root ball and to provide it with fresh, nutrient-rich soil. When repotting, it’s important to choose a new pot that’s at least 2 inches larger in diameter than the current one. This will give the roots enough space to spread out and continue to grow.
Before you repot your tree philodendron, take the time to examine its root system. If the roots have already started to circle around the pot, it’s a sign that it needs to be transplanted into a larger container. If you notice any damaged or unhealthy roots, you should prune them off with a clean blade. This will help ensure that your plant stays healthy and prevents the spread of any potential diseases.
When preparing the new pot, make sure it has drainage holes to allow excess moisture to escape. Tree philodendrons prefer a well-draining soil mix, so consider using a blend that includes materials like bark or chunky organic matter. This will help prevent water from pooling around the roots and causing them to rot. Fill the new pot about half full with the soil mix, making a small divot in the center to hold the root ball.
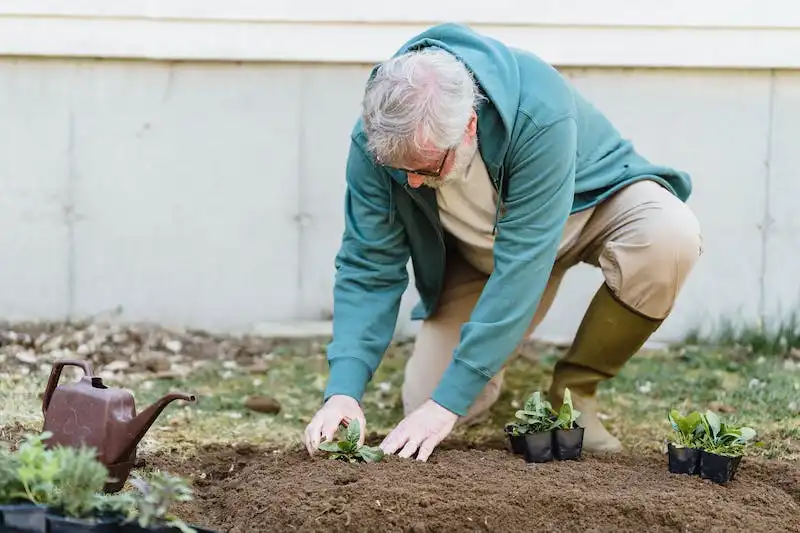
Gently remove the tree philodendron from its old pot, taking care not to damage the roots. If the plant is rooted tightly in the pot, you may need to slide a knife around the edge to loosen it. Once the plant is free, place it into the new pot, ensuring that the top of the root ball is level with or slightly above the rim of the pot. Fill in around the sides with additional soil mix, pressing it down gently to eliminate any air pockets.
After repotting, water the tree philodendron thoroughly, allowing the water to drain completely. Be careful not to overwater, as this can lead to root rot. In the first week or so after transplanting, it’s best to keep the plant in a slightly shaded spot to prevent it from getting too much direct sunlight. Once the roots have adjusted to the new pot and are well-established, you can return the plant to its usual spot and resume regular watering.
Keep in mind that tree philodendrons are tropical plants and thrive in warm indoor environments. They require consistent watering, with about once a week being a good guideline. If the leaves start to droop or the soil feels dry to the touch, it’s a sign that the plant needs water. On the other hand, if the leaves turn yellow and feel mushy, it’s a sign that it’s being overwatered.
By following these step-by-step tips, you can ensure that your tree philodendron is well taken care of and continues to thrive in its new pot. Transplanting your philodendron may seem daunting at first, but with a little care and attention, it can become a routine part of your plant care routine. Happy repotting!
7 Simple Steps to Repot Philodendrons + When To Do It
If your philodendron plant is looking a little worse for wear, it may be time to consider repotting. Repotting is a great way to give your philodendron a fresh start and ensure it continues to grow and thrive. Follow these simple steps to successfully repot your philodendrons:
- Assess the situation: Take a close look at your philodendron to determine if it needs repotting. If the roots are growing out of the drainage holes or the plant looks root bound, it’s time to repot.
- Gather your supplies: You’ll need a new pot that is one size larger than the current one, potting medium, and a sharp knife or blade for cutting the root ball.
- Prepare the new pot: Fill the new pot with fresh potting medium, leaving enough room at the top for the root ball to fit comfortably.
- Carefully remove the plant from its current pot: Gently loosen the soil around the edges of the pot and then turn the pot upside down. Tap or squeeze the sides of the pot to loosen the plant and carefully slide it out.
- Divide the root ball: If your philodendron has multiple stems or is too large for its current pot, you can divide the root ball. Use a sharp knife or blade to cut the root ball into smaller sections, making sure each section has roots and leaves.
- Place the plant in the new pot: Set the plant in the new pot, making sure it is centered. Add more potting medium around the sides and gently press it down, making sure to cover the roots.
- Water and care for your repotted philodendron: After repotting, give your philodendron a thorough watering to settle the soil. Place it in a bright, indirect light location and continue to care for it as you normally would, avoiding direct sunlight and overwatering.
By following these simple steps, you can successfully repot your philodendrons and give them the care they need to continue thriving. Remember to repot your plants every 1-2 years or when you notice signs of root bound or damaged roots. Taking these precautions will help ensure your philodendrons stay healthy and continue to produce those beautiful, lacy leaves.
How to repot philodendron
If you have a large philodendron plant that needs to be repotted, follow these step-by-step instructions to ensure its health and continue enjoying its beauty.
1. Assess the health of your plant: Before repotting, take a good look at your philodendron. Look for any damaged or yellowed leaves, as well as signs of pests or disease. If your plant is not in good health, focus on addressing these issues before proceeding with the repotting.
2. Choose the right size pot: The new pot should be about one or two sizes larger than the current one. This will give the roots enough room to grow and prevent them from becoming root-bound. Make sure the pot has drainage holes to allow excess water to escape and prevent waterlogged soil.
3. Prepare the new pot: Fill the new pot about one-third to one-half full with a well-draining potting mix. You can use a mix specifically formulated for philodendrons or a general-purpose potting mix that contains perlite or vermiculite for added drainage.
4. Remove the plant from its current pot: Gently slide the philodendron out of its current pot, being careful not to damage the roots. If the roots are tightly packed, you can use a pair of clean scissors or a knife to carefully loosen them.
5. Examine the roots: Take a look at the roots to ensure they are healthy and white. If you notice any brown or rotting roots, trim them off with clean scissors. This will help promote new growth and prevent potential issues in the future.
6. Place the plant in the new pot: Set the philodendron in the center of the new pot, making sure it is at the same level as it was in the previous pot. Fill in the gaps around the roots with more potting mix, pressing it down lightly to secure the plant.
7. Water and care for the newly repotted plant: After repotting, give the plant a thorough watering to settle the soil. Be careful not to overwater, as philodendrons prefer slightly moist soil. Place the plant in a spot with bright, indirect light, and maintain a humidity level of around 50%. Continue regular watering and provide occasional fertilizer to support growth.
Remember, repotting can be stressful for plants, so it’s important to take care when handling them. By following these steps and providing the right conditions, your philodendron will continue to thrive and bring beauty to your living space.
1 Prepare your tools
Before you begin the process of transplanting your tree philodendron, it is important to gather all the necessary tools. Here are the tools you will need:
- A newly purchased or clean pot, slightly larger than the one the tree philodendron is currently in
- Potting soil that drains well
- A tray or saucer to catch excess water
- A watering can
- Pruning shears or a sharp knife
Having all these tools in place will ensure a smooth and successful transplanting process for your tree philodendron.
2 Prepare the philodendron for the process
Before you begin the thorough process of transplanting your tree philodendron, it is important to prepare the plant to ensure it can successfully adapt to its new environment.
First, consider the humidity levels in the room where you choose to transplant the philodendron. This tropical plant thrives in high humidity, so be sure to choose a room that can provide the necessary moisture.
Next, examine the leaves of the plant to identify any signs of moss. If there is moss present, gently remove it from the leaves. Philodendrons do not like to have moss on their leaves, as it can prevent them from efficiently absorbing sunlight and can encourage rotting.
Once the leaves are moss-free, it is time to inspect the roots. Gently slide the plant out of its current pot and examine the roots. If they have become rootbound or if the pot is too small for the plant, repotting is needed. If the roots are healthy and not overcrowded, you can proceed with the transplant.
When removing the plant from the pot, be careful not to damage the roots. Use a clean, sharp blade to carefully cut away any roots that may have become too tangled or damaged. This will ensure that the plant can thrive in its new location.
Another important consideration is the size of the pot you will use for the transplant. Philodendrons do well in pots that are slightly larger than their current one. This will provide enough room for the roots to spread out and grow. Additionally, make sure the new pot has proper drainage to avoid overwatering and root rot.
Once you have prepared the philodendron, it is ready to be transplanted onto a cutting tray or a chunky potting mix. Make sure the mix is well-draining and does not hold too much moisture. This will help the roots establish themselves and prevent future problems.
By following these simple steps, you can ensure that your tree philodendron is well-prepared for its transplant and will continue to produce lush, healthy leaves in its new home.


