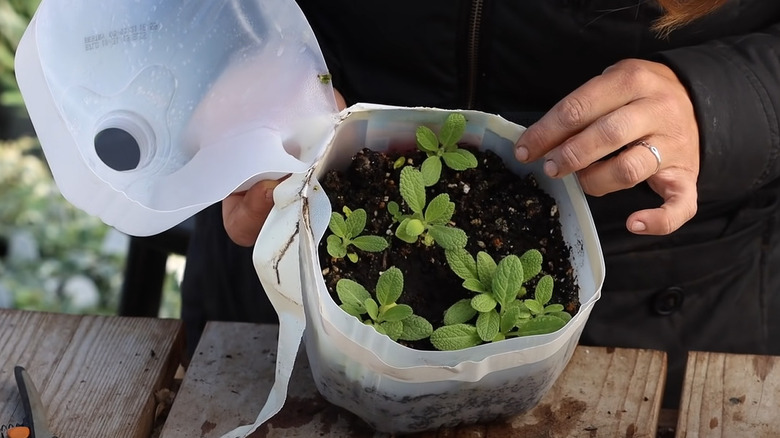
Your kitchen likely sees the disposal of several containers every year, especially if you go through a lot of milk. But what if you could repurpose those empty plastic milk jugs, imparting on them a new life that goes hand in hand with nature? Welcome to the world of milk jug winter sowing. With just a few tools and, of course, your old plastic milk containers, you can build a makeshift greenhouse in your yard that allows you to plant vegetables or flowers in the cold winter months, way ahead of spring’s official arrival — meaning that you’ll get a head start on your garden’s growing season without fancy indoor setups. Once your milk jug seedlings grow strong and sturdy, you can transfer them into individual containers or your garden.
Think of milk jug winter sowing as a silent rebellion against the typical sowing seasons. Plus, repurposing your milk jugs this way also means that your wallet gets a breather; come spring, you won’t have to spend a fortune on seedlings nurtured in a nursery. Even if you’re used to setting up a conventional seed-starting station indoors, this winter sowing hack can provide a little extra space when you’re out of room — not to mention that it slashes the risk of pests and diseases associated with the “green nomads” we call transplants bought elsewhere. However, in your enthusiasm to turn your old milk jugs into a mini winter garden, don’t forget that not all seed types are suited for this approach.
How do you sow seeds in a milk jug in the winter?

@gardenjensjourney / YouTube
First on your checklist is identifying the best plants for winter sowing with jugs. Your best candidates are crops that revel in the chill, including leafy greens; since the jugs will still be going out in your yard in the winter, this method is not for your heat-loving tropical plants. Next, wash your milk containers with warm, soapy water — you wouldn’t want an unwanted guest like mold ruining the show.
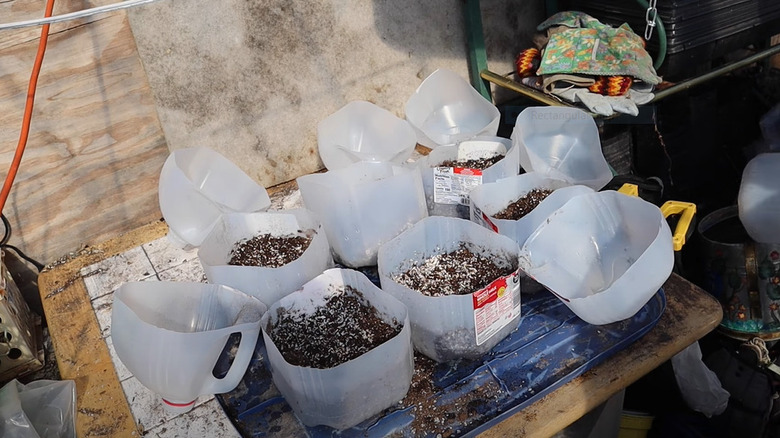
To transform these ordinary vessels, embellish their bottoms with a few slits or holes for drainage using a knife or scissors. Repeat the process near the top, creating slits for ventilation. With that same spirit, carve a horizontal line around the jug several inches from the bottom, but leave a small space near the handle untouched to create a lid hinge.
Proper soil is your plants’ lifeblood, and for milk jug winter sowing, a soilless mix with perlite, shredded bark, and fillers is ideal. Moisten this blend and pack it in the bottom of your milk jug around 4 inches deep. Next, sprinkle the seeds on top and press them in, followed by a light shower of water. Finally, seal each jug along the horizontal slit using tape and place it outside, where it can bask in the winter sun and occasional snow and drink in the rainwater. (Just remember to bring them inside if you’re expecting high winds!)
Caveats for winter sowing with milk jugs

@gardenanswer / YouTube
While creating your milk jug greenhouses is relatively simple, there are still some considerations to keep in mind. Achieving that “Goldilocks” zone of soil depth can be a challenge for milk jug winter sowing — too little soil dries out the seeds quickly, while too much soil makes it difficult for seedlings to emerge. You could also invite sand or horticultural grit to the party for better drainage. The pitfalls of beginning your winter sowing too early must also be highlighted, lest your seedlings meet an icy end. Picture this: Seduced by a balmy winter’s day, your seeds sprout prematurely, only to encounter frost soon after — a harrowing prospect. You may be excited to start your garden in the winter, but it’s still best saved for a little later into the season.
We also can’t overlook the sin of overcrowding. Overplanting is like cramming too many dreams into a limited space; it’s a recipe for stunted growth. However, fret not if you’ve skipped this step and ended up with a sea of squeezed seedlings. You can always move them to larger pots.
Finally, as spring unfolds and temperatures soar, your ingenious mini greenhouses could transform into oppressive hothouses. Here, unleash your plant parent instinct, ripping off the jug’s top to let the seedlings breathe. Hydrate them from below using a shallow tray and let them revel in the sun’s warm embrace for six hours daily for more vibrant growth.


