In the world of web development, encountering an HTTP 403 error can be frustrating. It’s like finding bare spots on your perfectly manicured lawn – something just isn’t right. Just as you water and nurture your grass to keep it full and green, you meticulously maintain your website, using all the right tools and techniques to ensure its smooth operation. But when a 403 error pops up, it’s like finding leaves and weeds spreading in those carefully tended spots: your traffic is being blocked and your users are unable to access your website.
So, what exactly is a 403 error? Well, the 403 status code indicates that the server understands the request that the client sent, but the server is refusing to fulfill it. It’s like trying to seed your lawn, but your spreader isn’t working properly, and instead of evenly distributing the seeds, it’s just killing the weeds. In the world of web development, a 403 error occurs when the server is aware of the client’s request, but access to the requested resource is forbidden for some reason.
The important thing is to identify the cause of the 403 error and take the necessary steps to fix it. Think of it as patching those bare spots on your lawn. One common cause of a 403 error is incorrect permissions on your web server. Just as you need a plan to properly seed your lawn, you need a plan to set the right permissions on your server. Another common cause is a misconfigured .htaccess file, which is like using the wrong type of grass seeds for your lawn – it just won’t grow.
Fortunately, fixing a 403 error is usually a straightforward process. You just need to identify the cause and follow the appropriate instructions to resolve it. Much like using Grotrax, an all-in-one grass seed mat, for overseeding your lawn, the solution for a 403 error is often easy to use and can get your website up and running again in no time. Just as Grotrax contains the perfect combination of seeds, fertilizer, and moisture-retaining materials, the solution to a 403 error often involves adding or removing certain components, using the right tools, or otherwise adjusting the settings of your website or server.
How to Easily Repair a Lawn That’s Covered in Patchy Spots
Having a beautiful lawn is a dream for many homeowners, but sometimes it can be challenging to maintain a perfect green carpet due to patchy spots caused by various factors such as weeds, disease, or neglect. Luckily, there are several steps you can take to easily repair and restore your lawn to its former glory.
Here is a quick guide on how to repair a patchy lawn:
| Step | Description |
|---|---|
| 1 | Identify the Cause |
| 2 | Prepare the Soil |
| 3 | Spread Seeds or Sod |
| 4 | Water and Maintain |
Step 1: Identify the Cause
Before you start repairing your lawn, it’s crucial to identify the cause of the patchy spots. Are they caused by weeds, disease, or simply wear and tear? By understanding the root cause, you can take the necessary steps to prevent it from happening again in the future.
Step 2: Prepare the Soil
Prepare the soil in the patchy areas before overseeding or laying sod. Rake the soil to remove any debris, leaves, or dead grass. You can also lightly till the soil to loosen it up, creating a better environment for the new seeds or sod to take root.
Step 3: Spread Seeds or Sod
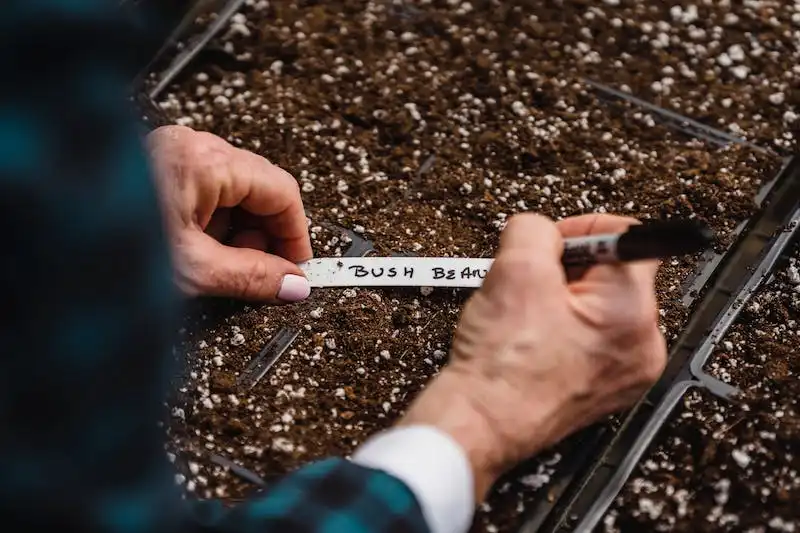
If the patchy spots are small, you can opt for overseeding. Choose a high-quality grass seed that is suitable for your lawn type and climate. Spread the seeds evenly over the prepared soil, making sure to make good contact with the soil. If the patchy spots are larger or you want instant results, you can consider using sod or “grotrax,” which is a combination of grass seed, mulch, and fertilizer.
Step 4: Water and Maintain
After spreading the seeds or sod, water the area gently but thoroughly to provide the necessary moisture for germination and establishment. Keep the seeded or sodded areas consistently moist by watering lightly several times a day. Ensure the newly repaired areas receive proper maintenance, such as regular mowing and weed control, to encourage healthy growth.
By following these simple steps, you’ll be able to repair and restore your patchy lawn in no time. Remember to give your lawn constant care and regular maintenance to keep it healthy and beautiful throughout the year.
For more information and detailed instructions on repairing a patchy lawn, you can visit our website, where you’ll find helpful tips, recommended equipment, and expert advice to make your lawn repair process even easier.
What You’ll Need
When it comes to fixing a 403 error on your website, there are a few things you’ll need to get started. Here’s a list of the essential tools and materials:
| 1. | A rake |
| 2. | At least one open, full bag of grass seed |
| 3. | A dethatching tool |
| 4. | A mower |
| 5. | A Grotrax or similar roll of grass seed mat |
| 6. | A starter fertilizer |
| 7. | Broadleaf weed killer or weed control materials |
These items are the basic necessities for repairing your lawn and getting rid of any 403 error related issues. Each of these tools and materials serves a purpose in the step-by-step process of fixing the problem and ensuring your lawn is healthy and error-free.
Equipment Tools
When it comes to repairing bare spots or patchy grass, you’ll need the right equipment tools to get the job done. Here are some tools that you may find useful:
- Grotrax: This all-in-one grass repair kit is perfect for easily fixing bare spots. It contains everything you need, including grass seed, fertilizer, and mulch.
- Rake: Use a rake to loosen the soil in the bare spots before seeding. This will help improve seed-to-soil contact and promote better germination.
- Spreader: A spreader is essential for even seed distribution. Whether you’re using a handheld spreader or a push spreader, make sure to apply the seeds evenly across the bare spots.
- Mower: Before seeding, it’s a good idea to mow the existing grass to a lower height. This will help the new seeds make better contact with the soil and ensure better germination.
- Watering can or hose: After seeding, make sure to water the bare spots gently. You’ll want to keep the soil consistently moist to promote germination and ensure the seeds don’t dry out.
- Broadleaf weed killer: If you have weeds in your bare spots, it’s important to kill them before seeding. Choose a herbicide labeled for broadleaf weeds and apply it according to the instructions.
Once you have all the necessary equipment tools, you’re ready to start repairing your bare spots. Here’s a step-by-step guide:
- Plan: Identify the areas with bare spots and determine what type of grass you have or want to plant.
- Prepare the soil: Use a rake to remove any debris or thatch from the bare spots. If the soil is compacted, you can use a garden fork to aerate it.
- Apply the seeds: Follow the instructions on the grass seed package for the recommended seeding rate. Use a spreader to evenly distribute the seeds on the bare spots.
- Add fertilizer: After seeding, apply a lawn starter fertilizer to promote healthy growth and establishment.
- Water: Water the seeded areas gently and consistently, keeping the soil moist but not oversaturated. Aim to provide about 1 inch of water per week for the first month.
- Mow: Once the new grass reaches a height of about 3 inches, you can mow it for the first time. Set your mower to the highest setting and mow the grass to a height of about 2 inches.
- Fertilize regularly: After the first month, you can switch to a regular lawn fertilizer and follow a fertilization schedule based on your grass type.
By following these steps and using the right equipment tools, you can easily repair bare spots in your lawn and enjoy a healthy and lush grass year-round. Remember to regularly monitor and control weeds, and make any necessary spot repairs throughout the year.
Materials
When it comes to repairing bare spots on your lawn, there are various materials you’ll need to get the job done. Here are the materials you’ll need:
- Lawns with weeds or sod removed
- Grotrax seed mat
- Starter fertilizer
- Contact your local lawn repair service
- Soil ready for seeding
- Fescue seeds
- Spreader
Here’s how you can proceed with the repair process:
- Identify the bare spots on your lawn.
- Remove any weeds or unwanted plants from the area.
- Prepare the soil by lightly raking it to loosen it up.
- Follow the instructions on the Grotrax seed mat and make sure it’s covered with soil.
- Apply a layer of starter fertilizer to promote seed germination.
- If you’re using fescue seeds, make sure to spread them evenly across the bare spots.
- Water the seeded areas regularly to keep the soil moist.
- Make sure not to overwater as it can lead to disease and weed growth.
- Once the grasses begin to grow, adjust your watering and mowing practices accordingly.
By following these steps and using the right materials, you can easily repair bare spots on your lawn and achieve a healthier and greener appearance. Remember to choose materials that are suitable for your specific lawn type and climate conditions.
Instructions
When it comes to maintaining a healthy and lush lawn, knowing what to do and when to do it is essential. Here are some step-by-step instructions to help you keep your lawn in perfect condition:
- Step 1: Before seeding your lawn, pick the right time of year. Depending on the type of grass you have, the ideal month for seeding may vary. Typically, it is best to seed warm-season grasses in late spring or early summer, and cool-season grasses in early fall.
- Step 2: Prepare the soil. Lightly rake the areas where you plan to seed to remove any debris and loosen the soil. If there are bare spots or areas with erosion, make sure to address those before proceeding.
- Step 3: Spread the seeds. Using a lawn spreader, distribute the seeds evenly over the prepared areas. Make sure to follow the instructions provided by the seed manufacturer for best results.
- Step 4: Cover the seeds. Lightly rake or use a seed cover to gently press the seeds into the soil. This will help improve seed-to-soil contact and promote better germination.
- Step 5: Water and maintain. After seeding, water the areas lightly to provide moisture for germination. Keep the soil consistently moist for the next few weeks, but be careful not to overwater. Avoid heavy traffic on the newly seeded areas to allow for optimal growth.
- Step 6: Kill weeds if needed. If your lawn contains various weeds, you may need to use a broadleaf weed killer. Follow the manufacturer’s instructions and apply the product to ensure effective weed control.
- Step 7: Repair patchy spots. If you notice patchy spots in your lawn even after seeding, you can consider repairing them using sod or grass seed. Follow the same steps as mentioned earlier for reseeding these areas.
By following these instructions and properly maintaining your lawn, you’ll have a healthy and thriving grass within no time. Remember to regularly mow, feed, and water your lawn to keep it looking its best all year round.


