When it comes to gardening, potting a plant is an essential skill every gardener should learn. Properly potting a plant ensures that it gets the right amount of water and nutrients, and provides a healthy environment for it to grow. In this article, we will go over the step-by-step process of potting a plant, from choosing the right container and potting medium to ensuring proper drainage.
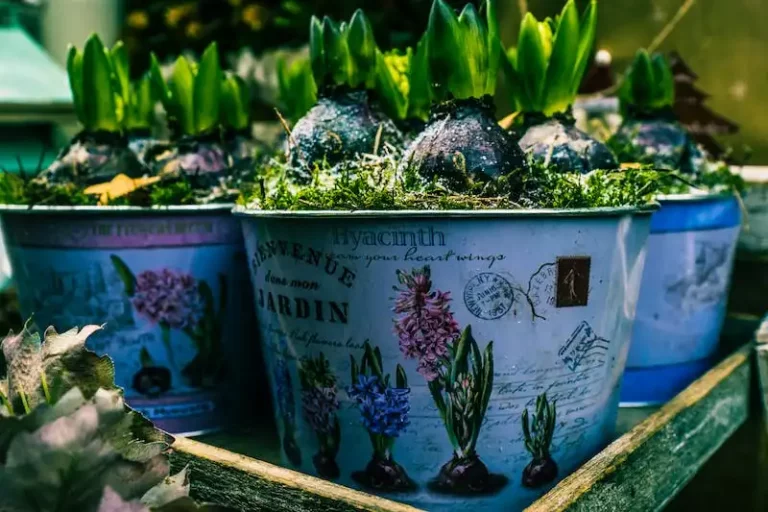
The first step in potting a plant is selecting the right container. The container should have drainage holes at the bottom to allow excess water to escape. Plastic containers are a popular choice for potting, as they are lightweight and easy to clean. It’s important to choose a container that is slightly bigger than the plant’s current one to allow for growth.
Next, you will need to choose the right potting medium. A good potting mix should be able to absorb and retain water, while also providing good drainage. There are many commercially available potting mixes that work well, or you can make your own by mixing equal parts garden soil, peat moss, and perlite. It’s important to note that different plants may require different types of potting medium, so do some research about the specific plant you are potting.
Now it’s time to repot the plant. Gently remove the plant from its current container, being careful not to damage the roots. If the roots are bound, you may need to loosen them by gently massaging the root ball. Place the plant in the new container, making sure it is centered. Fill in the gaps around the plant with potting mix, pressing it down gently to ensure the plant is secure.
After potting, it’s important to thoroughly water the plant. This helps to settle the potting mix and removes any air pockets. Water the plant until water begins to drain out from the bottom of the container. It’s also a good idea to fertilize the plant at this time, as repotting can be stressful for the plant and it may need extra nutrients.
Finally, find a suitable location for your potted plant. Different plants have different light and temperature requirements, so it’s important to place them in a spot that meets their needs. Keep in mind that indoor plants may require more frequent watering than outdoor ones, as the environment tends to be drier. Also, be sure to monitor the plant for signs of stress, such as wilting or yellowing leaves, and adjust your care accordingly.
In conclusion, potting a plant is a simple yet important skill for any gardener. By following these steps, you will ensure that your plants have a healthy growing environment and can thrive in your garden or home. Remember to choose the right container and potting mix, as well as provide proper drainage and care for your plants. With a little bit of practice and experience, you’ll become a pro at potting plants in no time!
How to Repot a Houseplant the Right Way
Repotting a houseplant is an important task that ensures the proper growth and health of your indoor greenery. It also allows you to choose a better container and soil for your plants, providing them with the right conditions to thrive. If you notice your plant is rootbound or if it has outgrown its current pot, it’s time to repot.
Before you begin, gather all the necessary tools and materials for the job. You’ll need a pot that is slightly larger than the current one, potting soil, scissors, and a watering can. It’s also a good idea to choose a pot with good drainage to avoid water retention.
- Prepare the new pot by filling it with fresh potting soil, leaving enough space for the plant’s root ball. Make sure the soil is loose and free of any clumps.
- Gently remove the plant from its current pot by squeezing the sides and slowly lifting it out. If the plant is stubborn, tap the pot’s bottom to loosen it.
- Examine the root system of the plant. If it is rootbound, you’ll see a dense mass of roots winding around the soil. In this case, use your fingers or a blunt tool to loosen the roots slightly. This will encourage new root growth.
- Place the plant into the new pot, making sure it is centered. Add more soil around the sides, pressing gently to secure the plant in place.
- Water the plant well after repotting to help settle the soil. Make sure the water gets evenly distributed and reaches the bottom of the pot.
- After repotting, make a note of the date and any other important information about the plant. This will help you keep track of when it was last repotted and how it has been growing.
- Place the repotted houseplant in a suitable spot in your home. Consider its light and temperature preferences to ensure it gets the best conditions for growth.
- Continue to care for the repotted plant as you would with any other houseplant. This includes regular watering, fertilizing, and occasional pruning if needed.
- Monitor your plant closely in the weeks following repotting. Look for signs of stress or overwatering, such as wilting leaves or yellowing. Adjust your watering schedule if necessary.
Repotting houseplants is a simple process that can greatly benefit your indoor green friends. With the right knowledge and experience, you’ll find it easier and more rewarding over time. So, take the time to properly care for your plants and enjoy the beauty they bring to your home.
How Often to Repot Your Houseplants
Repotting your houseplants is an essential part of keeping them healthy and thriving. As plants grow, their roots require more space and nutrients to support their growth. By repotting your houseplants, you provide them with fresh soil and a larger container to accommodate their needs.
So, how often should you repot your houseplants? While there isn’t a one-size-fits-all answer, there are a few general guidelines to follow. Most houseplants will benefit from being repotted every 1 to 2 years. However, some fast-growing plants may need to be repotted more frequently, while others may be happy in their current containers for longer periods.
The first step in determining if your houseplant needs to be repotted is to carefully remove it from its current container. Gently slide the plant out, being careful not to damage the roots. If you notice a dense root ball that’s tightly packed and has filled the entire pot, it’s a sign that your plant is root-bound and needs to be repotted.
Another sign that your houseplant needs to be repotted is if the soil is getting excessively dry or if you find it challenging to keep the plant hydrated despite regular waterings. When the roots fill the container, it becomes harder for water to penetrate the soil and reach the roots, leading to dehydration.
When repotting, choose a container that is slightly larger than the current one. This will provide room for the roots to grow. Additionally, select a potting medium that suits your plant’s needs. Different plants require different types of soil, so do some research or ask your local gardening center for advice.
Before placing your houseplant into the new pot, prepare the container by adding a layer of drainage medium at the bottom. This could be pebbles, broken pottery, or specialized drainage materials. This layer will help ensure proper drainage and prevent root rot.
Once your container is prepared, remove the plant from its old pot, gently massage the root ball to loosen it up, and trim any damaged or excessively long roots with clean scissors. Place the plant into the new pot, making sure it sits at the same depth as it did in the old container.
After repotting, water your plant thoroughly to help settle the soil and remove any air pockets. Make sure to water slowly and evenly, allowing the water to be absorbed by the new soil. If any excess water collects in the drainage tray, be sure to remove it to prevent root rot.
It’s important to note that some houseplants may not need repotting as frequently. For example, orchids typically prefer to be root-bound and will bloom better when their roots are confined. Additionally, plants that go dormant during the winter may not require repotting until they start actively growing in the spring.
Ultimately, the frequency of repotting your houseplants will depend on their specific needs and growth patterns. By observing your plants and staying knowledgeable about their care requirements, you’ll be able to determine the best time to repot them. Remember, repotting is a great way to promote healthy growth and ensure that your houseplants thrive in their home environment.
Take the time to assess your houseplants and decide if they’re due for a repotting. It’s always better to give your plants adequate space for growth rather than rushing into it.
Note: If you have pets at home, be cautious when repotting your plants. Some plants can be toxic to animals, so do your research or consult with a veterinarian if you’re unsure.
Signs It’s Time to Repot Your Houseplant
If you’re a proud owner of a houseplant, you’ll want to ensure that it stays healthy and happy in its home. One of the most important aspects of caring for your houseplant is knowing when it’s time to repot it into a larger container. Repotting allows the plant to have more space for root growth and ensures that it has enough soil and nutrients to thrive.
Here are some signs to look out for that indicate it’s time to repot your houseplant:
1. Root Bound
If you notice that the roots of your plant are growing out of the drainage holes at the bottom of the pot, or if the soil becomes tightly packed with roots, it’s a clear sign that your plant is root bound and needs more room to grow.
2. Stunted Growth
If your plant’s growth has slowed down or stopped altogether, it may be a sign that it has outgrown its current pot. When a plant becomes root bound, it has limited access to nutrients and water, which can result in stunted growth.
3. Soil Dries Out Quickly
If you find yourself watering your plant more frequently than before and the soil still dries out quickly, it could be an indication that the roots have taken up most of the available space and there’s not enough soil to retain moisture.
4. Poor Drainage
If water rushes through the pot and doesn’t absorb into the soil, it’s a sign that the container lacks proper drainage. Repotting your plant into a container with drainage holes will prevent water from pooling around the roots and causing root rot.
5. Plant Becomes Top-Heavy
If your plant starts to tip over or becomes unstable in its current pot, it’s a sign that the root system has grown too big for the pot to support the weight of the plant. Repotting it into a larger, more stable container will help keep it upright.
When it’s time to repot your houseplant, follow these simple steps:
1. Choose the Right Container
Buy a new container that is one size larger than the current one. Make sure it has drainage holes to ensure proper water flow.
2. Prepare the Plant
Remove the houseplant from its current pot. Loosen the roots with your fingers or gently squeeze the sides of the pot to help release the plant.
3. Fill the Container
Fill the new container with fresh potting soil, leaving enough space for the plant’s root ball.
4. Repot the Plant
Place the plant and its loosened roots into the new container. Slide the root ball into the container and adjust the plant so it sits upright.
5. Pack the Soil
Fill the gaps with additional potting soil and gently pack it around the plant’s roots. Avoid compacting the soil too tightly.
6. Water Thoroughly
Water the repotted plant thoroughly, allowing the water to drain through the drainage holes. This will help settle the soil and ensure good hydration for the plant.
By keeping an eye out for these signs and following the steps for repotting, you’ll be able to provide your houseplant with the best possible home for healthy growth and continued plant happiness.
Source: Peter Peterson, “Repotting Houseplants: A Step-by-Step Guide for Healthy Growth”


