Creating a unique and eye-catching garden feature is as easy as assembling a rustic willow obelisk. With just a few simple materials, such as boards, reclaimed wood, or even willow branches, you can construct a beautiful pyramid-shaped structure that adds height and dimension to your garden.
Before getting started, it’s useful to have a template or image of the obelisk you want to create. This will help guide you through the process and ensure that your finished product looks perfectly tailored to your garden. Whether you choose a more traditional style with woven willow bands or a more modern look with white painted wood, the options are endless.
To start, gather your materials. Depending on the size and style of obelisk you want to create, you may need boards, willow branches, or other sturdy wood. If you’re using willow branches, make sure they are dried and flexible enough to bend without breaking. If using reclaimed wood, sand it down to remove any rough edges or paint remnants.
Next, assemble the base of the obelisk. This step is crucial as it will provide stability to the entire structure. You can use posts or even large planters filled with sand to anchor the obelisk. Secure the verticals and horizontals to the base, making sure they are evenly spaced and securely fastened. The diagonal supports, known as wales, should be added to give the obelisk extra strength.
Once the framework is complete, you can start weaving the willow branches or adding the wooden bands. If using willow, soak the branches in water for a few hours to make them more pliable. Start at the base and work your way up, attaching the branches with jute or twine. For wooden bands, simply screw or nail them into place along the horizontal and diagonal supports.
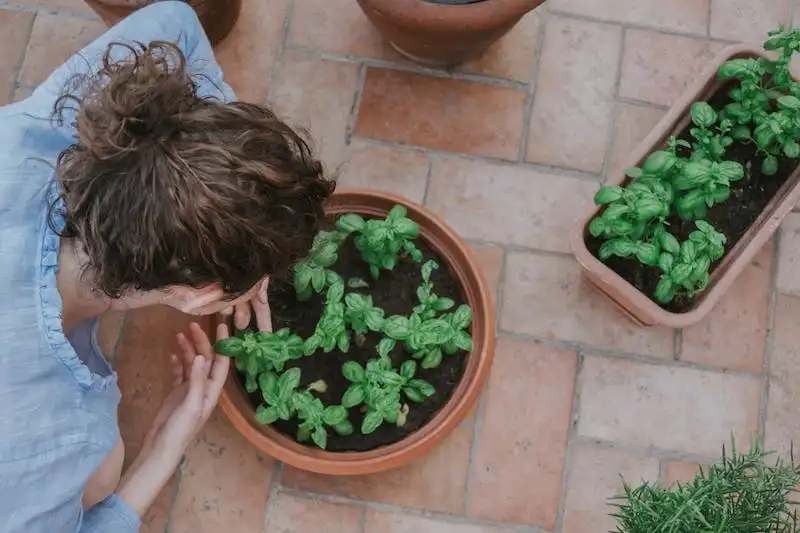
After all the weaving or banding is done, double-check that everything is securely fastened and tighten any loose branches or bands. Give the obelisk a good visual inspection, making sure it’s straight and sturdy. If you’re happy with how it looks, let it dry completely before placing it in your garden.
Once the obelisk is ready, you can choose to leave it as is for a natural, rustic look, or paint it white for a more classic appearance. Either way, it will make a stunning focal point in your garden, creating a vertical element that draws the eye and makes even the smallest space feel more expansive.
Whether you’re looking to grow climbing plants, create a trellis for your favorite flowers, or simply add a touch of architectural interest to your garden, making an obelisk is a rewarding and fun project that anyone can undertake. So why not get inspired and start building your own obelisk today?
How to Make a DIY Garden Obelisk Willow Plant Support
If you’re looking for a unique and natural way to support your garden plants, a DIY garden obelisk made from willow is a great option. These plant supports not only provide structure for your vertical-growing plants but also add a beautiful and rustic touch to your garden. Here’s how you can make your own willow obelisk:
1. Gather the necessary materials. You’ll need willow branches, a bucket of water, eight nails, a hammer, a saw, and some twine or wire.
2. Start by soaking the willow branches in water for at least 48 hours. This will help to make the branches more flexible and easier to work with.
3. Once the branches are soaked and flexible, start by creating a base for your obelisk. Take three willow branches and tie them together at the top in a pyramid shape, leaving enough length at the bottom to secure them into the ground.
4. To create the vertical structures of the obelisk, choose three willow branches of equal length and attach them to the base. Use twine or wire to secure them in place.
5. As you build up the obelisk, you can add more branches to increase its strength and stability. Simply weave the new branches in between the existing ones, using twine or wire to secure them.
6. Once you’ve reached your desired height for the obelisk, secure the top of the vertical structures together with twine or wire.
7. If desired, you can paint your willow obelisk to match your garden’s color palette. White or a light color works well for a classic look, but feel free to get creative and add a pop of color with blue or turquoise!
8. Let the obelisk dry completely before moving it to your garden. This will help to ensure its stability and prevent any bending or warping.
Now you have your own DIY garden obelisk made from willow! These obelisks are not only functional but also add a unique and natural element to your garden. Experiment with different shapes and sizes, and let your creativity run wild. Happy gardening!
Make a DIY Garden Obelisk
Creating a garden obelisk is a great way to add a vertical support structure for climbing plants in your garden. Whether you want to grow flowers, vegetables, or fruit, a garden obelisk can provide the necessary support for your plants to thrive.
To create your own DIY garden obelisk, you will need three main materials: wood, jute, and willow twigs. The wood will be used to construct the frame of the obelisk, while the jute and willow twigs will be used for weaving and adding decorative touches.
- Start by cutting six wooden slats to the desired length for the height of your obelisk. Usually, a height of 5-6 feet works well. Sand down the edges to avoid splinters.
- Next, gather your supplies. You will need jute twine, willow twigs, and a pair of garden shears.
- Begin by assembling the wooden slats into a circular shape. Use screws or nails to secure the ends together. This will form the base of your obelisk.
- Once the base is assembled, start weaving the jute twine around the vertical slats, starting from the bottom and working your way up. This will create a sturdy frame for the obelisk. Make sure to tie each strand tightly to ensure stability.
- Add willow twigs to the frame by weaving them in between the vertical slats. This will add texture and visual interest to your obelisk.
- Continue weaving the twine and adding willow twigs as needed until you reach the top of the obelisk. Trim any excess twine or twigs that stick out.
- For a finishing touch, you can add a wooden finial or other decorative element to the top of the obelisk.
- If desired, you can paint the wooden frame of the obelisk to match your garden aesthetic. White is a popular choice, but feel free to get creative with colors.
- Once your obelisk is complete, find a suitable spot in your garden to place it. Obelisks are often placed in the middle of flowerbeds or near fruit trees.
- Now you can start using your garden obelisk for supporting climbing plants such as roses, clematis, or even fruit vines. Enjoy the beautiful vertical structure and the possibilities it brings to your garden!
Remember, creating a DIY garden obelisk may require some manual work, but it is worth it in the end. The obelisk will not only provide support for your plants but also add a charming focal point to your garden. So grab your tools and get started on your garden obelisk project today!
Using a DIY Garden Obelisk
If you have a trellis, a couple of nails, and some basic supplies, you can easily make your own garden obelisk. This DIY project is a great way to add height and interest to your garden. Here’s a step-by-step guide on how to make and use a DIY garden obelisk:
- Start by building the frame of the obelisk. Take three rods and secure them together at one end to form a triangle shape.
- Using a wale or a piece of twine, weave it in and out of the rods to create a sturdy base for the obelisk.
- Add more rods to the base, securing them with nails or screws. Repeat this process until you reach the desired height of the obelisk.
- Once the obelisk is complete, it’s time to plant it in your garden. Find a spot where it will be visible and make sure the base is securely placed in the ground.
- Now, it’s time to decorate your obelisk. You can paint it in a color that matches your garden or leave it plain for a more natural look.
- If you prefer a rustic look, you can add some texture to your obelisk by attaching pieces of bark or white-painted carols.
- Next, you can use the obelisk as a trellis for climbing plants. Slightly trim the branches of the plant and guide them to the obelisk. As the plants grow, they will wrap around the obelisk and create a beautiful display.
- For an alternative use, you can hang planters from the obelisk. Simply attach planters at various heights along the rods, and fill them with your favorite flowers or herbs.
- Alternatively, you can turn your obelisk into a drying rack by hanging herbs or flowers from it.
Using a DIY garden obelisk is not only a practical way to support your plants, but it also adds a unique element to your garden. With a little creativity, you can customize your obelisk to suit your style and needs. Be sure to check out online videos and DIY forums for more ideas on how to use an obelisk in your garden.
Materials Needed for a DIY Willow Garden Obelisk
Creating your own DIY willow garden obelisk is a lovely and rustic way to add vertical interest to your garden. To make your own obelisk, you will need the following materials:
1. Willow rods: Willow rods are the main building material for your obelisk. You will need around 9 to 10 long, flexible willow rods, depending on the desired size of your obelisk.
2. Sand: Sand is needed for supporting the base of the obelisk and ensuring stability.
3. Reclaimed boards: Reclaimed boards can be used for creating the base of your obelisk and securing the vertical rods.
4. Nails: Nails will be used for attaching the boards together and securing the vertical rods.
5. Tying materials: You will need materials like twine or wire for tying the willow rods together at various points, creating the framework of your obelisk.
6. Salvage containers: Salvage containers can be used to hold the willow rods while weaving them together, making it easier to create the desired obelisk shape.
7. Hand saw: A hand saw is necessary for trimming the willow rods to the desired length and removing any rough edges.
8. Sanding block: A sanding block can be used to smooth out the rough edges of the willow rods after trimming.
9. Stain (optional): If you prefer a darker color for your obelisk, you can use a stain to add color to the willow rods.
10. Basic weaving tools: Basic weaving tools like a wale and a weaver are needed for creating the traditional lattice pattern when weaving the willow rods together.
Once you have gathered all the necessary materials, you can start building your DIY willow garden obelisk. Ensure that you have measured and cut your willow rods to the appropriate length and have secured the bottoms in sand-filled containers. Then, follow the basic template or create your own unique design. You can also check online videos or projects for additional tips and methods.
Remember to periodically trim the willow as it grows to maintain the shape of your obelisk. With proper care, your DIY willow garden obelisk can last for many years, adding beauty and charm to your garden.


