Growing and maintaining a garden is a rewarding and fulfilling hobby. For gardeners who want to expand their plant collection, propagating plants is a great way to do so. The Garden Helper is an invaluable resource, providing a step-by-step guide to propagating plants for beginners and experienced gardeners alike.
The Garden Helper is like an encyclopedia for plant propagation. It covers various methods, such as stem cuttings, layering, and leaf cuttings, ensuring that you can find the best technique for your specific plant. For example, if you want to propagate a plant that has long, trailing stems, layering might be the best option. On the other hand, if you have a houseplant with large leaves, leaf cuttings may be the way to go.
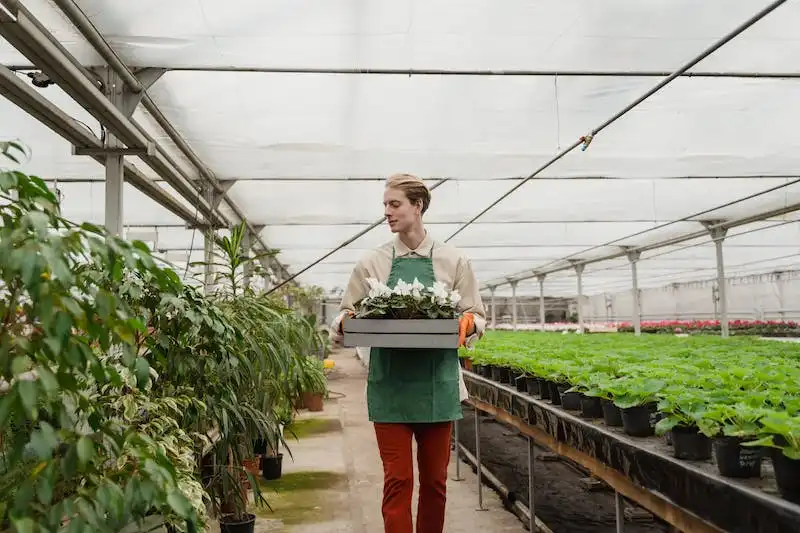
Before getting started, it’s important to gather all the necessary materials. These include a sharp, clean blade or scissors, rooting hormone powder, a pencil or similar object for making holes, and some type of propagation tray or pot. It’s also recommended to wear gloves to protect your hands during the propagation process.
Once you have everything you need, you can choose the method that suits your plant and proceed with the propagation process. The Garden Helper provides clear, easy-to-follow steps for each method, ensuring that you have the knowledge and confidence to propagate your plants successfully. It even includes optional steps, such as using a propagator to create a humid environment for your cuttings, which can increase the chances of successful root growth.
Monitoring your cuttings is crucial for their health and development. The Garden Helper advises checking the cuttings regularly for signs of growth, such as new leaves or roots. It also provides tips on how to water the cuttings properly to prevent under- or over-watering, which can damage the fragile root systems.
In conclusion, The Garden Helper is an essential tool for gardeners who want to expand their plant collection through propagation. Whether you’re just starting out or have years of experience, this resource has all the information you need to ensure successful propagation and enjoy the beauty of growing your own plants.
Dieffenbachia Propagation: A Step-by-Step Guide to Growing New Plants
Dieffenbachia plants are popular houseplants loved by many garden enthusiasts. If you have a dieffenbachia plant and would like to expand your collection or share it with others, propagation is a great option. There are several methods you can use to propagate dieffenbachia plants, including stem cuttings, air layering, and dividing the plant into multiple pieces.
Stem Cuttings: To propagate dieffenbachia plants using stem cuttings, start by choosing a mature, healthy stem. Use sharp and clean tools, such as pruning shears or a sharp knife, to make a clean cut just below a leaf node. The cutting should be around 3 to 4 inches long.
Once you have your cutting, remove the lower leaves to create a bare stem. Dip the cut end of the stem in rooting hormone, ensuring it is well coated. Place the cutting in a small container filled with a well-draining, moist potting mix. Firmly press the soil around the cutting to ensure good contact.
Keep the cutting in a warm and humid location, away from direct sunlight. Mist the cutting regularly to maintain humidity. After a few weeks, you should start to see new roots forming. Once the roots have developed, you can transition the new plant into a larger pot with regular potting soil.
Air Layering: Air layering is another popular method of propagating dieffenbachia plants. This method requires more time and effort but has a higher success rate.
To air layer a dieffenbachia plant, choose a healthy and mature stem. Make a small cut on one side of the stem, and carefully remove the bark to expose the inner wood. Dust the exposed area with rooting hormone to encourage root growth. Wrap the exposed area with moist sphagnum moss and cover it with plastic wrap to retain moisture.
Secure the moss and plastic wrap in place using twist ties or plant ties. Over time, roots will develop within the moist moss. Once sufficient roots have formed, carefully cut below the air layer and plant it in a separate container filled with potting soil.
Divisions: Divisions are another straightforward method of propagating dieffenbachia plants. Start by removing the plant from its pot and carefully dividing it into multiple pieces. Each division should have its own set of roots and leaves.
Plant the divisions in separate containers filled with potting soil, making sure to provide proper care and attention afterward. Keep the newly divided plants in a warm and humid location until they establish their root systems and show signs of new growth.
In conclusion, dieffenbachia propagation offers garden lovers the possibility of growing new plants. Whether you choose stem cuttings, air layering, or divisions, it’s essential to provide the proper care and attention to ensure successful growth. With careful planning and the right techniques, you can expand your collection of these beautiful houseplants.
Learn more about dieffenbachia plants and other specific techniques through gardening resources, such as books or online encyclopedias. If you have any questions, don’t be afraid to ask experienced gardeners or seek advice from your local gardening community.
1 Gather your Materials
To successfully propagate your plants, it is important to gather all the necessary materials beforehand. Keep in mind that most plants can be propagated using similar methods, while others have specific requirements.
Here are the materials you will need:
- Pruning shears or sharp scissors to remove the clippings from the parent plant.
- A well-draining potting mix for the newly propagated plants.
- Containers or pots to prepare the new plants.
- Developed plants that you want to propagate.
- A powdered hormone, which can help stimulate root formation.
- Moistened potting mix to ensure the cuttings stay hydrated.
- A tray or saucer to keep the cuttings in a humid environment.
- Water to regularly moisten the potting mix.
When gathering your materials, be sure to take extra care with clippings. Some plants, such as dieffenbachias, can irritate the skin, so wearing gloves is recommended. It’s important to remove any leaves that will be below the soil line to prevent bacterial or fungal infection.
Once you have gathered all your materials, you can proceed to the next step of propagating your plants.
2 Choose the right Stem Cutting
When it comes to propagating plants, choosing the right stem cutting is essential. Different plants have different requirements, so it’s important to select the right type of cutting for the plant you want to propagate. Here are a few things to consider:
1. Choose a healthy stem: Look for a stem that is free from any bacterial or fungal infections. It should be firm and green, showing no signs of disease or damage.
2. Look for a node: Nodes are the points on a stem where new growth can form. When taking a stem cutting, make sure it has at least one node. This will ensure that the cutting has the ability to develop roots.
3. Select the right length: The length of the stem cutting depends on the plant you are propagating. In general, a four-inch stem cutting with at least two nodes is a good starting point.
4. Remove any attached leaves: While some plants can be propagated with leaves attached to the stem cutting, others require the removal of leaves. Read up on the specific plant you are propagating to see if leaves should be removed or left intact.
5. Use a sterile medium: To promote the growth of roots, it’s important to use a sterile and well-draining medium. This can be a mix of peat moss, perlite, or vermiculite. Avoid using soil, as it can introduce diseases and pests to the cutting.
6. Provide the right environment: Different plants have different environmental requirements for rooting. Some plants, like tropical species, will benefit from a warm and humid environment, while others prefer a cooler and drier setting. Make sure to provide the right conditions for successful propagation.
7. Use rooting hormone: A rooting hormone can help stimulate root growth and increase the chances of successful propagation. Follow the instructions on the packaging to determine the proper application and dosage.
By following these guidelines, gardeners can ensure that they choose the right stem cutting for propagation and give their plants the best chance of rooting and growing successfully.
3 Prepare the Cuttings
Before you start propagating your Dumbcane plant, make sure you have the right materials and tools. Here is a step-by-step guide on how to prepare the cuttings:
- Choose a healthy and long stem from the main growth of the Dumbcane plant.
- Cut the stem just below a node, which is a small bump on the stem where the leaves and roots grow from.
- Optional: Wash the stem with water to remove any dirt or debris.
- Fill a plastic tray with a propagation medium. This can be a mixture of perlite and peat moss, or you can use a seed-starting mix.
- Moisten the propagation medium to provide a humid environment for the cuttings. The medium should be damp, but not soaking wet.
- Gently insert the cuttings into the medium, making sure they are planted firmly.
- Wrap the plastic tray with clear plastic to create a mini greenhouse. This helps to maintain the humidity levels and create a suitable environment for root development.
- Place the tray in a warm and indirect light location, such as near a window. Avoid placing it in direct sunlight, as it can damage the cuttings.
- Monitor the moisture levels in the tray and water as needed. It’s important to keep the medium damp, but not waterlogged.
- Within a few weeks, the cuttings should start developing roots. You can gently tug on the cuttings to check if they have rooted.
- Once the cuttings have rooted, they can be transplanted into individual pots filled with a well-draining potting mix.
- Continue providing proper care for the transplanted cuttings, such as regular watering, indirect light, and humid conditions.
- In conclusion, propagating Dumbcane through stem cuttings is one of the most successful methods of reproduction. By following the step-by-step guide above, you can easily propagate your Dumbcane plant and create new plants to share with others or expand your indoor garden.
If you have any questions about the propagation process or the requirements for Dumbcane plants, consult a gardening encyclopedia or reach out to a knowledgeable plant enthusiast.


