The beautiful, bright blooms of hydrangeas make them one of the more sought-after plants to add to a garden. If you already have one, you could spread that joy by propagating them. You can even share a few with friends once you learn how to grow hydrangeas from cuttings. You’ll need to get a few things right to see success, including the timing and how to take the hydrangea cuttings themselves. After taking the cuttings and cleaning up the leaves and stems, you’ll then need to root them properly.
Rooting hormone or rooting powder is an important part of ensuring good root growth of the new plant. You’ll want to use it to help your plants get the best start and then place the cuttings into soil quickly. Once you have them placed, it’s then necessary to care for the cuttings over the coming months to ensure they have optimal growing conditions. Initially, you can plant these cuttings into smaller pots, but you’ll likely need to replant them over time as they grow out their roots. Planting hydrangeas like this can be an excellent way to create a stunning display in your yard. In most areas, it’s best to propagate hydrangeas in the spring — only after the plants have leafed out well — or into the late summer. Typically, those in warmer climates will be able to continue to do this into the early fall as long as the plants haven’t started to go dormant.
Taking the cuttings and preparing to grow hydrangeas

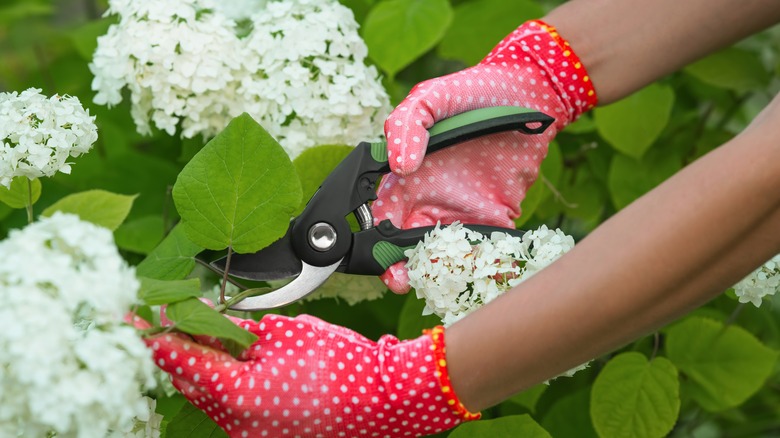
Use sharp pruners (preferably ones that are properly cleaned and sanitized) to take your cutting from a healthy, hearty plant. Ensure the hydrangea bush is not stressed in any way and is flourishing. Then, look for the perfect leaf node — one that is on a healthy branch that has not yet had any flower buds develop is ideal. You’ll want to cut about 2 inches below that node. Choose a stem that offers enough length, at least 6 inches, though up to 8 is ideal. You can choose cuttings that are shorter, even down to 3 inches, but you’ll want to ensure the stem has three or more nodes. These cuttings, often referred to as softwood cuttings, can do well if they haven’t flowered yet.
Once you have the cutting, don’t simply plant it. Instead, you’ll need to trim back most of the leaves from it, leaving just a few of the uppermost leaves in place. Use your pruners to cut close to the stem, but don’t nick it. You want the stem to remain as healthy and intact as possible. Then, place the cutting into a wet paper towel until you are ready for the next step.
Planting your hydrangea cuttings
Use a rooting hormone powder to encourage the hydrangea cutting’s roots to grow. Follow the product’s instructions for use, which usually include wetting the cutting and dipping it into the powder. Shake off any extra, and set them aside for a few minutes to allow some of the water to evaporate.
In the meantime, ready your potting soil for the cuttings. Choose a pH-balanced soil to fill the containers, and create a hole in the dirt using the end of a pencil. Place the cutting into the hole. You can plant several cuttings like this into one container — keeping them about 2 inches apart from each other for the best results. Aim to get at least one node under the soil, but it’s best if two of the nodes on the stem are buried.
Keep the plant’s soil moist over the coming weeks. If possible, place the entire plant into a clear plastic tote with a lid, or place a clear plastic bag loosely over it to create a greenhouse-like effect. It typically takes about a month for a strong root system to develop. During this time, keep them in indirect sunlight. Once the cuttings show leaf growth and put up some resistance when pulling upwards on them, it’s time to transplant the hydrangeas into larger containers. Allow them to grow a bit more, to about 18 inches. Finally, place them in the garden. Then, grow and care for them like you would any hydrangea.
