One of the most exciting things for any gardener is the beginning of springtime, when the front yard starts to come alive with the vibrant colors of blooming flowers. Not only do flowers bring beauty to our lives, they also serve as essential pollinators for many species of plants. With a bit of wit and some seeds, you can bring an abundance of flowers to your garden next season.
Starting flowers from seed is a sign of a seasoned gardener who understands the wisdom of patience. As the Veronica plant starts to grow, you can finally see the fruits of your labor. The Old Farmer’s Almanac is your trustworthy guide for all things gardening. The first step is to decide which flowers you want to grow and when to plant them. Some plants prefer to be started indoors, a little earlier than their optimal planting time. Others can be directly sown into the ground at the beginning of spring.
The next thing you need is a light source. Most plant starts need 14-16 hours of daily light to grow well. Many gardeners use fluorescent lights or specialized plant lights. Once you have your light set up, it’s time to prepare the soil. You can use a knife or your own hands to dampen the soil and make it ready for planting.
Now it’s time to sow the seeds. Using your finger or a planting tool, make small holes in the soil according to the packet instructions for each type of seed. Generally, you want to place the seed about twice as deep as its size. It’s important to space them out properly to give the growing plants enough room to develop fully. After placing the seeds, cover them gently with soil and lightly water them so the soil is damp but not soggy.
While waiting for the seeds to sprout, you can continue to water them lightly. Once the seedlings have emerged, you can start watering from the bottom to encourage strong root growth. As the plants grow and develop their first set of “true” leaves, you may need to thin them out if too many seeds sprouted in one spot. Thinning them out will provide more space and resources for the remaining plants.
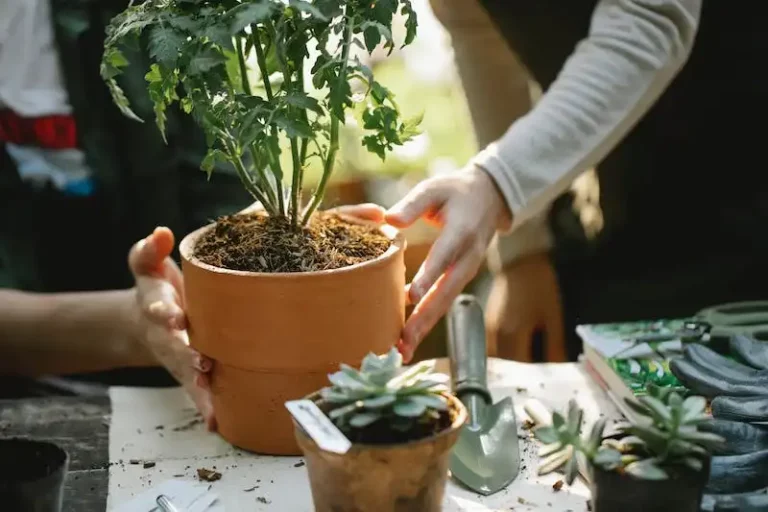
When the last sign of frost has passed and the weather has warmed up, it’s time to transplant your newly grown flowers into the garden. Dig a hole in the preferred spot in your garden and carefully remove the seedling from its container. Gently place the plant in the hole, making sure the roots are spread outwards. Cover the roots with soil and press it down firmly against the base of the plant.
Now that your flowers are in the ground, continue to water them regularly, keeping the soil slightly damp. Pay attention to any specific care instructions for the type of flowers you have planted, as different varieties may have different watering needs. With care and attention, your newly started flowers will soon thrive, welcoming you with their beautiful blooms.
How to Plant Flowers From Starting Seeds to Planting in the Ground
If you’re an aspiring gardener, starting flowers from seeds is a great way to begin. Not only is it cost-effective, but it also allows you to grow a wide variety of flowers that might not be available as established plants. This guide will take you through the steps, from starting seeds indoors to planting them in the ground.
Seed Starting
1. Begin by gathering the seeds of the flowers you want to grow. Make sure to choose varieties that are suitable for your climate and growing conditions.
2. Fill a seed-starting tray or containers with a seed starting mix. This specialized soil mixture provides the optimal conditions for seed germination and growth.
3. Moisten the seed starting mix thoroughly. It should be damp but not soaking wet. Use a spray bottle or watering can to avoid overwatering.
4. Plant the seeds according to the instructions on the seed packet. This usually involves placing two or four seeds in each cell or container, spacing them evenly. Cover the seeds with a thin layer of seed starting mix or vermiculite.
5. Place the seed-starting tray or containers in a warm and well-lit location, such as a south-facing window. If you don’t have enough sunlight, you can use seed-starting mats or artificial grow lights to provide the necessary light and warmth.
6. Keep the soil consistently moist by watering the seeds daily or as needed. Avoid overwatering, as it can lead to damping-off disease and root rot.
7. Within a few weeks, you should start seeing the seeds sprout and the first set of true leaves appear. Once the plants have several sets of leaves and are about an inch tall, they are ready to be moved to larger containers or planted in the ground.
Planting in the Ground
1. Choose a suitable location in your garden for planting the flowers. Consider factors like sunlight, soil type, and spacing requirements for the specific flowers you’re growing.
2. Prepare the planting area by removing any weeds or unwanted plants. Loosen the soil with a garden fork or tiller to improve drainage and root penetration.
3. Gently remove the seedlings from the seed-starting tray or containers, being careful not to damage the delicate rootball. You can use a small knife or spoon to help with this process.
4. Dig a hole in the prepared planting area that is large enough to accommodate the rootball of each seedling. Place the seedling in the hole and fill in the soil around it, ensuring that the plant is at the same depth as it was in the seed-starting tray.
5. Firmly press the soil around the base of the seedling to eliminate any air pockets. Water the newly planted seedlings thoroughly to help settle the soil and provide hydration.
6. Mulch the area around the plants with a layer of organic mulch, such as wood chips or straw. This will help conserve moisture, suppress weed growth, and protect the roots from extreme temperatures.
7. Monitor the newly planted flowers closely, especially in the early stages of growth. Water them regularly, depending on the weather conditions, to ensure they establish well and grow strong.
Remember, each flower has its own specific requirements, so always refer to the seed packet or a reliable gardening resource for more detailed information. With proper care and attention, your seeded flowers will soon thrive and bloom, making your garden more colorful and vibrant.
For daily wit & wisdom sign up for the Almanac newsletter
Starting your own flower garden can be an exciting journey, whether you’re a seasoned gardener or just starting out. Starting flowers from seed is a great way to grow a wide variety of plant varieties and get your garden started on a budget.
So, how do you start flowers from seed? Here is a step-by-step guide to help you get started:
- Gather your supplies: To start flowers from seed, you’ll need trays or pots, seed-starting mix, seeds of your choice, and a light and warm place to grow your seedlings.
- Decide on the seeds: Choose the flower varieties you want to grow. Consider factors such as the optimal growing conditions, the care they need, and if they attract pollinators.
- Prepare the trays or pots: Fill the trays or pots with the seed-starting mix, leaving about 1/4 inch of space at the top. Moisten the mix with water, ensuring it is evenly damp but not soaking wet.
- Sow the seeds: Follow the planting instructions on the seed packet, which will guide you on how deep and far apart to plant the seeds. Use your finger or a small tool to make holes in the seed-starting mix, place the seeds in the holes, and cover them lightly with the mix.
- Provide optimal conditions: Place your trays or pots in a warm and well-lit area, such as a sunny windowsill or under grow lights. Keep the soil moist by watering from the bottom or using a misting bottle.
- Wait for germination: Depending on the flower variety, the seeds should start to sprout within a week or two. Be patient and keep providing the necessary care.
- Move seedlings to bigger pots: Once the seedlings have developed their second set of leaves, it’s time to transplant them into larger pots or individual plug cells. This will give their roots more space to grow.
- Harden off the plants: Before planting your newly grown flower seedlings in the garden, gradually expose them to outdoor conditions by placing them outside for a few hours each day. This will help them adjust to the outdoor environment and prevent transplant shock.
- Plant in the garden: When the last frost date has passed and the weather has warmed up, it’s time to plant your flowers in their final spot. Choose a part of your garden that receives full or partial sun, and make sure to space the plants according to their recommended distances.
Starting flowers from seed is a cost-effective and rewarding method of growing beautiful plants. With a little patience, care, and the right conditions, you’ll be welcoming an abundance of colorful flowers to your garden in no time. Sign up for the Almanac newsletter to receive daily wit and wisdom to enhance your gardening journey.
Where to Get Seeds and Plants
One of the first steps in starting flowers from seed is to find a reliable source for your seeds and plants. There are several options to consider:
1. Local garden centers and nurseries: When springtime arrives, many garden centers and nurseries have an abundance of seeds and plants available for sale. This is a convenient option because you can physically see the plants and make your selections.
2. Online seed catalogs and websites: There are numerous online seed catalogs and websites that offer a wide variety of flower seeds and plants. These platforms provide detailed descriptions of each plant variety, along with tips for planting and care.
3. Seed exchanges and sharing: If you are part of a gardening community or have friends who garden, seed exchanges can be a great way to acquire new and interesting varieties. This allows you to trade seeds with other gardeners, expanding your collection and supporting local pollinators.
4. Planting from existing flowers: Once your flowers have started to bloom, you might choose to save the seeds and plant them the following spring. This method can be particularly rewarding, as you can witness the entire growth cycle of the plant.
Regardless of where you get your seeds and plants, it’s important to choose varieties that will thrive in your specific growing conditions. Consider factors such as sunlight, soil type, and climate when making your selections.
Read Next
Once you have started your flowers from seed, you might be wondering what you should do next. Here are some tips to help you along:
| 1. Get the goods: | Before you start planting, make sure you have all the necessary tools and supplies, like a seed-starting light, trays, seed starting mix, and more. |
| 2. Consult the almanac: | Check your local almanac for the best time to start sowing seeds indoors. |
| 3. Start with easy seeds: | If this is your first time growing flowers from seed, start with easy-to-grow varieties like marigold or veronica. |
| 4. Care for your seedlings: | Once your seeds have sprouted, make sure to water them regularly and give them enough light to keep them growing strong. |
| 5. Harden off before planting: | Before moving your seedlings outdoors, you’ll need to gradually acclimate them to the outdoor conditions by moving them outside for increasing periods of time. |
| 6. Know your spacing: | Learn how far apart to plant your seedlings to give them enough room to grow without getting too crowded. |
| 7. Provide support: | If you’re growing tall flowers like sunflowers or delphiniums, you may want to provide stakes or cages to support their growth. |
| 8. Welcome pollinators: | To ensure a bountiful flower garden, make sure to attract pollinators like bees and butterflies by planting flowers that they are attracted to. |
| 9. Continue learning: | If you’re new to gardening, there is always more to learn. Explore online gardening sites, join gardening forums, or sign up for a gardening newsletter to expand your knowledge. |


