The canna lily, with its vibrant and striking flowers, is a favorite among gardeners. But what do you do with the bulbs once winter comes? How do you ensure their survival until spring? In this complete guide, we will walk you through the necessary steps for preparing and storing canna lily bulbs over winter.
If you live in a region with mild winters, you can choose to leave the canna lilies in the ground and they’ll often survive. However, if you experience freezing temperatures or heavy frost, it is best to dig up the bulbs and store them until spring. This ensures the bulbs remain intact and healthy, ready to regrow when warmer weather arrives.
There are a few methods you can choose from when it comes to overwintering your canna lily bulbs. Some gardeners prefer to store the bulbs in a cool dry place, such as a basement or garage, while others opt for a slightly more controlled environment, like a greenhouse. Whatever method you choose, the key is to make sure the bulbs are kept dry and away from freezing temperatures.
Before storing your canna lily bulbs, it is important to properly prepare them. Start by digging up the bulbs after the first frost has killed the foliage. Use a shovel to carefully lift the bulbs out of the ground, ensuring you do not damage them in the process. Then, remove any excess soil, deadheading the plants, and cut off any damaged or rotting parts. This will help prevent disease and ensure that only healthy bulbs are stored.
Time to Pot Up Your Overwintered Canna Lily Bulbs
Now that winter is over, it’s time to start preparing your overwintered canna lily bulbs for the warmer months ahead. If you followed our guide on storing canna lily bulbs, you should have a stash of healthy bulbs ready to sprout and grow. Here’s a step-by-step guide on how to pot up your overwintered cannas:
1. Dig them up: Carefully dig up your stored canna lily bulbs. Be careful not to damage the bulbs or the shoots that may have started to sprout.
2. Prepare the pot: Get a large pot or container that has drainage holes at the bottom. Fill it up with a well-draining potting mix, such as a mix of peat moss and perlite.
3. Plant the bulbs: Place the bulbs in the pot, ensuring that they are planted deep enough (about 2 inches) and spaced apart. You can plant multiple bulbs in the same pot if it’s big enough to accommodate them.
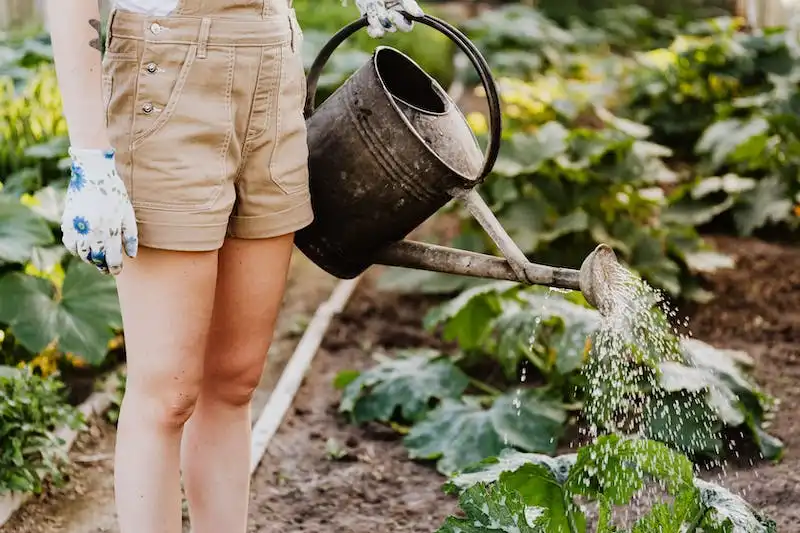
4. Watering: Give the newly planted bulbs a thorough watering. Make sure the soil stays moist but not waterlogged. Watering once every few days is usually sufficient, but adjust based on the moisture levels in your area.
5. Provide sunlight: Place the pot in a sunny location where the cannas will receive at least 6 hours of direct sunlight per day. If you’re growing them indoors, place the pot near a bright window or use grow lights to supplement sunlight.
6. Pinching and dead leaves: As the cannas start to grow, you may notice some yellow or dead leaves. Gently pinch them off to promote healthy growth. Keep an eye out for any pests or diseases and take appropriate action if needed.
7. Fertilizing: Once the cannas have established and started producing new leaves, you can start fertilizing them. Use a balanced fertilizer, following the instructions on the packaging. Avoid over-fertilizing, as this can lead to excessive foliage growth at the expense of flowers.
8. Enjoy the flowering: With proper care, your potted cannas should start flowering in about 2-3 months after planting. Enjoy the striking blooms and vibrant colors!
Remember to bring your cannas indoors if the temperatures drop below freezing. These tropical plants won’t survive in cold temperatures, so it’s important to protect them.
If you’re moving your cannas to a different location, make sure to pack them carefully to avoid damaging the bulbs or shoots. Use a sturdy box or container and fill in any empty spaces with packing material, such as newspaper or bubble wrap.
Storing cannas as houseplants during winter can be a little extra work, but the reward of having beautiful blooms year after year is worth it. Follow this guide to ensure your cannas stay healthy and continue to thrive!
Overwintering Storing Canna Lily Bulbs – The Complete Guide
Overwintering canna lily bulbs is essential if you want to ensure the survival of these vibrant and tropical plants. Cannas are not cold-hardy and cannot withstand freezing temperatures, so proper care must be taken to protect them during the winter months.
The first step in overwintering canna lily bulbs is to prepare them for storage. In late summer or early fall, you should begin the process of digging up the bulbs. Start by cutting back the foliage to about 6 inches above the ground. Then, carefully lift the bulbs from the soil, being cautious not to damage them in the process.
Once the bulbs have been lifted, you will need to cure them before storing. This involves allowing the bulbs to dry out in a warm and well-ventilated area for about a week. This will help prevent rotting during storage.
After the bulbs have been cured, it’s time to prepare them for storage. Remove any loose dirt from the bulbs, but be careful not to wash them. Leaving a thin layer of dirt on the bulbs will help protect them and ensure their health during dormancy.
Now, you have a couple of options for storing your canna lily bulbs. One method is to leave them in the pot and store them in a cool, dark location such as a basement. Another option is to store them in a box or container filled with dry peat moss or wood shavings. Whatever method you choose, be sure to label the bulbs so you know which are yours come planting time.
When it comes to watering overwintered canna bulbs, you’ll want to be careful not to overdo it. Too much moisture can cause the bulbs to rot, so it’s best to err on the side of underwatering. Just give the bulbs a light watering every now and then to keep them from drying out completely.
If you live in a warmer climate, you may be able to leave your cannas in the ground over the winter. However, it’s still a good idea to follow the above steps to prepare the bulbs and ensure their survival.
By following these methods for overwintering and storing canna lily bulbs, you can enjoy the beautiful blooms of these tropical plants year after year.
Remember, though, that overwintering canna lilies is not a guarantee. Some bulbs may still die during the winter months, especially if they weren’t properly prepared or stored. But with a little extra care and attention, your cannas have a good chance of surviving the winter and coming back to life in the spring.
| Canna Lily Bulb Overwintering Tips |
| 1. Cut back foliage to about 6 inches above ground |
| 2. Carefully lift bulbs from the ground |
| 3. Cure bulbs by drying them for about a week |
| 4. Remove loose dirt from bulbs, but don’t wash them |
| 5. Choose a storage method: pot or box with dry peat moss/wood shavings |
| 6. Label bulbs for easy identification |
| 7. Water lightly to prevent drying out |
| 8. Optional: leave cannas in the ground in warmer climates |
Will Canna Lilies Survive Winter
If you live in a region with cold winters, you may be wondering if your canna lilies will survive the winter. While canna lilies are typically grown as perennials in warmer climates, they can also be grown as annuals in cooler areas. If you want to keep your canna lilies for the next growing season, you’ll need to do everything you can to help them survive the winter.
First, it’s important to know that canna lilies are not frost-tolerant. When a frost is forecasted, you should take action to protect your plants. One way to do this is by thinning out the foliage. By removing some of the leaves, you can reduce the chances of frost damage.
If you have your canna lilies planted in the ground, you can carefully dig them up before the first frost. Gently shake off any excess soil and cut back the foliage to about 2 inches. Next, you need to prepare the bulbs for storing over the winter. Inspect each bulb carefully, discarding any that are soft, mushy, or damaged. Leave the healthy bulbs with an eye or two attached. This is where new growth will emerge in the spring.
For storing canna lilies, you have two options. One option is to store the bulbs as they are, without removing the soil. This will help prevent the bulbs from drying out. You can place the bulbs in a cardboard box or a paper bag and store them in a cool, dark basement or garage.
The other option is to pack the bulbs in dry peat moss or sawdust. This will help keep the bulbs hydrated and protect them from extremes in temperature. When packing the bulbs, be sure to separate them so they don’t touch each other. This will prevent any diseases from spreading.
If you prefer to store canna lilies in pots, you can simply bring the pots indoors before the first frost. Place them in a cool, dark location, such as a basement or garage. Make sure to check on them periodically throughout the winter to ensure they aren’t rotting or drying out. If the soil feels dry, give them a little bit of water.
It’s important to note that canna lilies don’t go into a full dormancy like other bulbs. They still require a small amount of water and light during the winter months. However, you want to be careful not to overwater them, as this can cause the bulbs to rot.
When spring arrives, you can start to bring your canna lilies out of their winter storage. Begin by putting the pots or bulbs in a bright location with indirect sunlight. Gradually increase their exposure to sunlight over a week or two. Once the danger of frost has passed, you can plant the canna lilies back in the garden or begin watering and fertilizing the potted plants.
By following these guidelines, you can ensure that your canna lilies survive the winter and grow healthy and striking in the next growing season.


