We all know you must sharpen your knives and scissors regularly to keep them in tip-top shape. Any amateur cook will tell you that a sharp knife is the key to success in the kitchen. What about gardeners, though? While gardeners don’t use knives, they do use shovels, and gardening tools also need to be kept in tip-top shape. Like a dull knife, a shovel needs to be sharpened to keep it working its best. You can sharpen a shovel using a hand file or you can use an angle grinder to make it quicker and easier. The goal is to get the edges as sharp enough to break through dry earth and roots, but not as sharp as you’d want your favorite pair of kitchen scissors.
Shovels gradually become dull over time through repeated use. Unlike knives and kitchen tools, though, which are regularly cleaned, shovels are often forgotten. While shovels and spades are built to be durable, over time, that caked-on dirt can damage the metal and cause the blade to become dull and useless. So, how exactly do you safely sharpen a shovel, and just how sharp should it be? Below we dig into the details of shovel sharpening, so you’ll never have to purchase a new spade again.
Is there such a thing as too sharp?

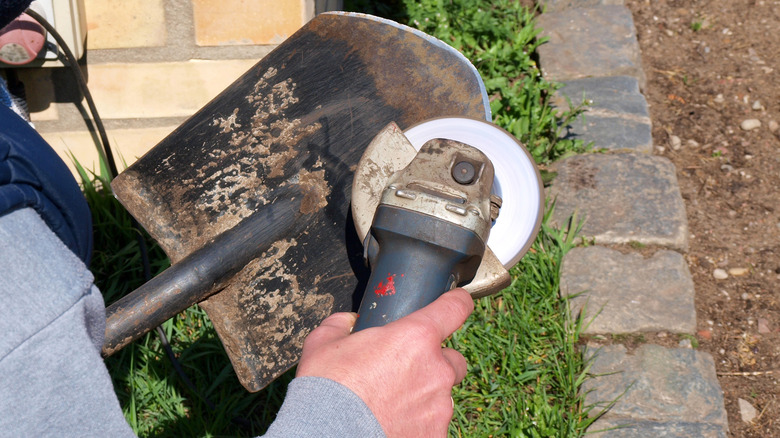
The term to sharpen a shovel might be a little confusing. Your shovel needs to be sharp enough to cut through earth with minimal effort — it is a tool, after all — but not so sharp you could inflict bodily damage with it. Your fully sharpened shovel should be considerably less sharp than a brand-new paring knife. A shovel can be sharpened with an angle grinder or a utility file, but first, you’ll want to clean the spade thoroughly. Next, sharpen it with the angle grinder and then file the blade with a mill bastard file.
To sharpen it with a utility file, remember to work along the edges of the spade so that it keeps the angles intact. The technique is much the same as sharpening knives, and the whole process from start to finish shouldn’t take more than ten or fifteen minutes. However, if you use the more efficient angle grinder your process will be a little different. Make sure you keep the blade spinning away from your body and gently allow the grinder to do the work. Even if you aren’t doing intense ditch-digging, keeping your gardening spades sharp is a good idea. Gardening is supposed to be fun, after all, and nothing will take the enthusiasm out of digging more than a dulled spade.
Safety first

Always remember that the tools you’ll be using have the potential for serious damage, so personal safety isn’t something you want to overlook. If you sustain a cut — even a small one — while sharpening a rusty blade, that could mean a trip to the hospital and a pricey tetanus shot. Before you get into the actual sharpening, secure the head of the shovel in place by using some strong clamps and attaching it to a table or work surface. Make sure the spade is horizontal (blade up) so that you don’t have to do a lot of bending while you work.
If there’s rust — which is very common in gardening tools — it will need a more thorough cleaning. A little WD-40 should clear any rusty bits right up. When it comes to actually sharpening, always sharpen away from the edge, as this will decrease your chance of getting hurt. A good pair of gloves and goggles is also a good idea to have on hand. If you’re using an angle grinder, sparks will be flying, so you’ll want to protect your eyes and hands.


